I still remember the first time I asked myself, “how to water bath can peaches”—standing in my little kitchen surrounded by fruit and uncertainty. Over the years, it’s become one of my favorite summer traditions. If you’re new to preserving, this post is for you: a friendly, tested walk-through of everything I’ve learned (with mistakes and all) on water bath canning.
In this guide I’ll cover water bath canning jars, water bath canning recipes, how to sterilize canning jars, water bath canning equipment, water bath canning supplies, how to seal canning jars, a water bath canning time chart, boiling water canning, and how long to water bath can pickles. Let’s get you confident with that first jar.
Water Bath Canning Jars
Choosing your jars is more than a matter of style—it’s about safety and reliability. When I started, I learned the hard way that not all glass is created equal.
- Always use jars made for home canning (Mason jars, Ball, Kerr, Weck, etc.). These are annealed to withstand the heat changes in processing.
- Never use old sauce or store-bought jars not rated for canning—they may crack or fail during processing.
- Stick to common sizes: half-pint, pint, or quart jars. Choose based on your recipe and how soon you’ll use the contents.
- Before using, inspect each jar for chips, cracks, or flawed rims. A seemingly minor flaw can cause a leak or breakage mid-process.
Personally, I keep two types in rotation: Ball wide-mouth pints for jams and smaller preserves, and quart jars for salsa or tomato mixtures. The wide-mouth jars make scooping easier.
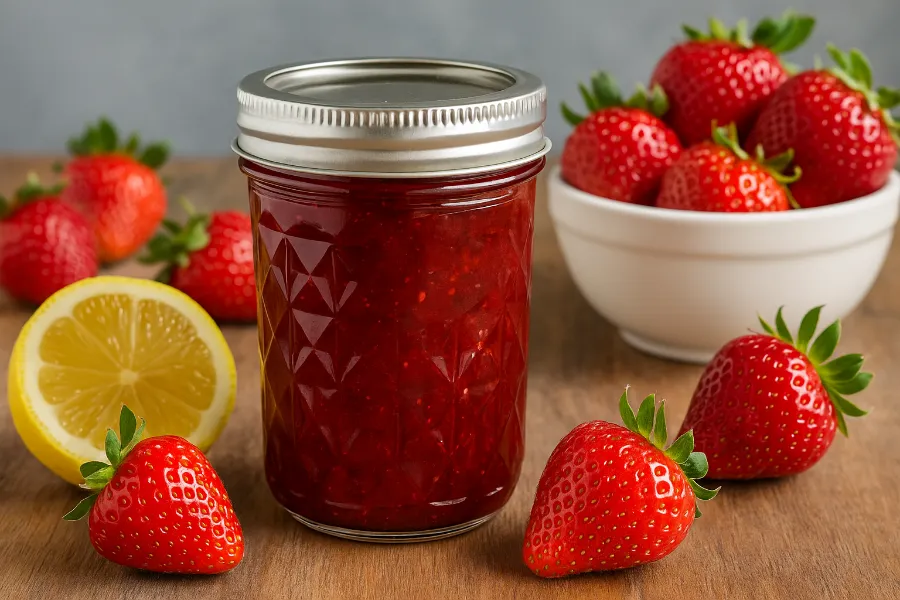
Water Bath Canning Recipes
Once your jars are ready, you’ll want recipes that are safe, tested, and delicious. Here are a few of my go-to favorites:
- Strawberry jam — simple fruit + sugar + lemon. Great “first can.”
- Dill pickles — crunchy classic.
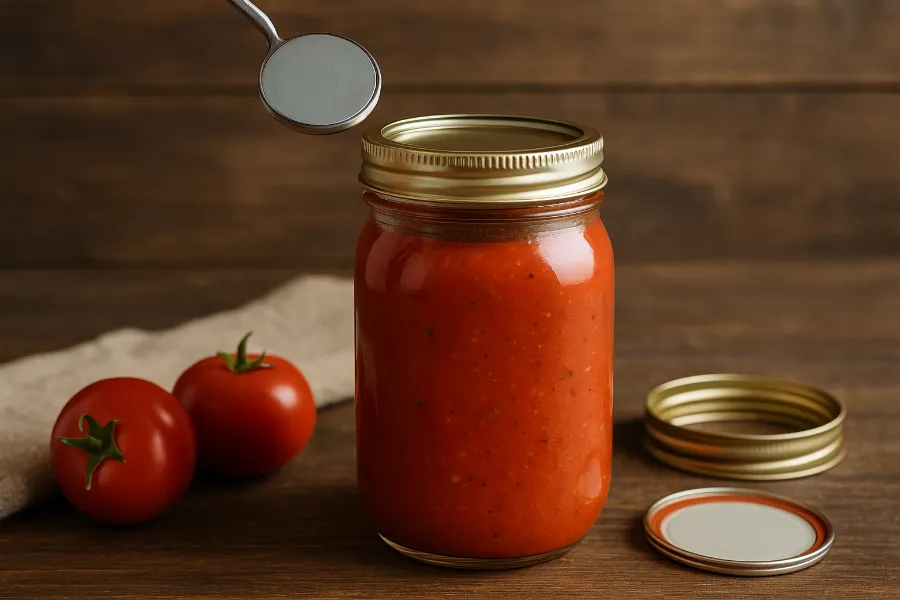
- Tomato sauce (acidified with lemon juice) — a pantry staple.
- Peach preserves — summer sweetness in a jar.
- Salsa — with added vinegar or acid to keep safety.
Tips for using recipes:
- Always use tested recipes from trusted sources (extension services, Ball Blue Book, USDA, etc.).
- Don’t tweak the proportions of acid, sugar, or processing time lightly. That’s where mistakes happen.
- If a recipe gives times for both pint and quart jars, follow those individually.
- When trying something new, do a small batch first to build confidence.
I like to keep a running list in my canning journal of recipes I love and notes about what worked or didn’t in my own kitchen.
How to Sterilize Canning Jars
Sterilizing is one of those steps that feels tedious—but it’s essential for safe, long-lasting preserves.
Here’s how I do it in my kitchen:
- Wash thoroughly. Clean your jars, lids, rings, and tools in hot, soapy water, then rinse well.
- Simmer in hot water (10 minutes). Place jars upright in a large pot of water, bring to a boil or high simmer, and maintain the boil for 10 minutes. If you live at high altitude, extend by 1 minute per 1,000 ft.
- Keep the jars hot. Leave them in the hot water (or in your canning pot) until just before filling. This reduces shock when hot food enters the jars.
- Lids & bands: Modern lids don’t usually need full sterilization. I typically heat them in hot (not boiling) water or gently simmer to soften the sealing compound.
Note: If your recipe’s processing time is 10 minutes or more, many guides say pre-sterilizing isn’t strictly necessary because the processing does it. But until you’re comfortable, I always sterilize to reduce stress.
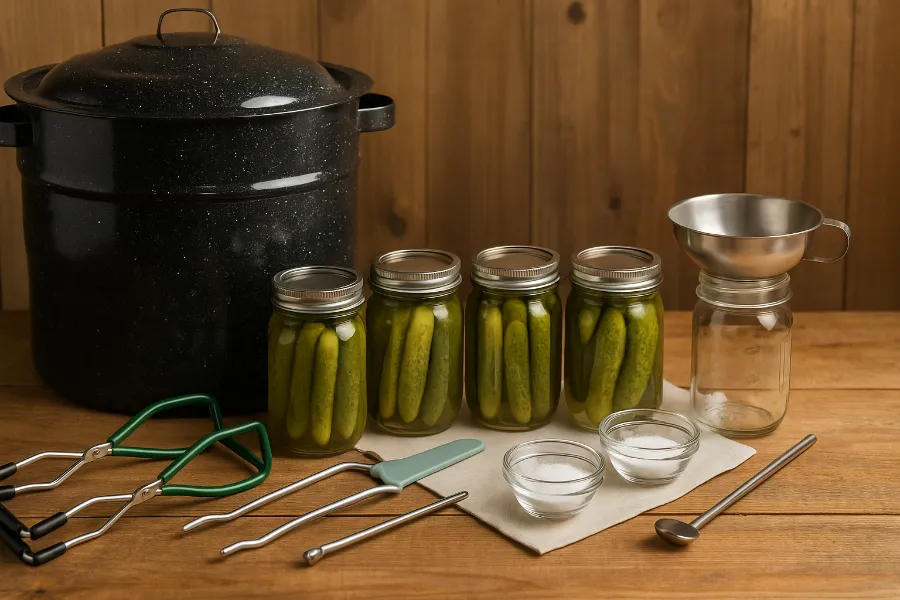
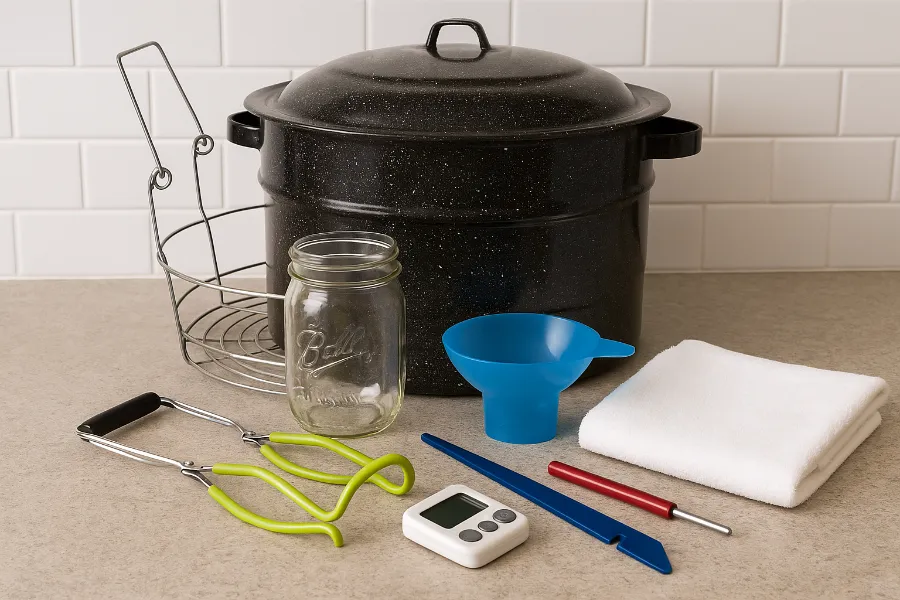
Water Bath Canning Equipment
Let’s talk about the “gear” I consider essential (and which ones I’d skip early on). Over time, I’ve learned which tools are lifesavers—and which are just nice-to-haves.
Here’s what I use almost every canning session:
- Canner / Large pot: Deep enough that when jars are inside, water covers them by at least 1 inch. My go-to is a tall stockpot or a dedicated water bath canner.
- Canning rack: Keeps jars off the bottom so they don’t crack and ensures good circulation.
- Jar lifter: For safely lifting hot jars in and out of boiling water.
- Funnel (wide-mouth): To fill jars without spills.
- Bubble remover / spatula: To release trapped air.
- Magnetic lid lifter: Helps set lids without touching them.
- Timer / thermometer: So you can track processing and water temperature accurately.
- Clean towels / cooling space: For setting jars safely after processing.
Many beginners ask: “Do I need all that?” Technically, you could do with less—but each tool makes the job safer and easier. On forums, folks often suggest picking up a 21-quart pot + rack + jar tools set to start cheaply.
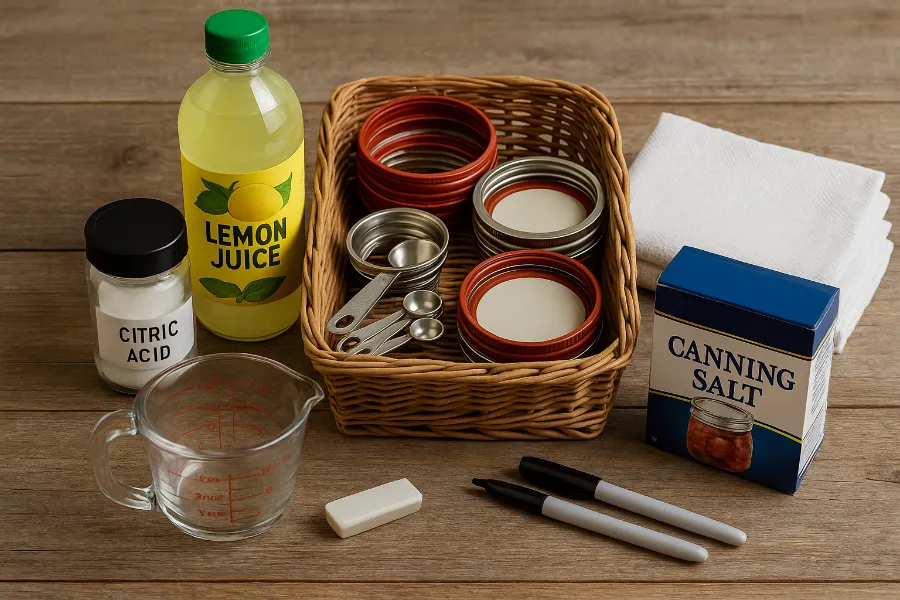
Water Bath Canning Supplies
Beyond the heavy equipment, there’s a handful of supplies you’ll use every time. Here’s what I always keep stocked:
- New flat canning lids (these are single-use)
- Reusable rings/bands (check for rust or damage)
- Citric acid or bottled lemon juice / vinegar (for acidity adjustments)
- Canning salt (without additives)
- Labels / markers (date and contents)
- Measuring cups / spoons / ladles / nonreactive utensils
- Kitchen towels / paper towels
Pro tip: I keep a little “canning tray” box with all my lids, rings, salt, labels, and tools in one place. Having everything within arm’s reach saves me from awkward hunts mid-session.
How to Seal Canning Jars
Hearing that “pop!” when a seal forms is one of the most satisfying parts of canning—but you have to do it right.
Here’s how I consistently get strong seals:
- Always use a new flat lid—never reuse old ones.
- Wipe the jar rim clean just before placing the lid. Any ketchup, fruit bits, or residue can prevent a proper seal.
- Place the lid centered, then screw the band fingertip-tight—firm, but not overly tight. The jar must vent air during processing.
- After processing, do not touch or tilt jars while cooling. Let them sit undisturbed 12–24 hours.
- When checking the seal, press the center of the lid. If it doesn’t move, that’s good. Try removing the band—if the lid stays on, you have a true seal.
If a jar fails to seal, I always refrigerate and use within a week (or reprocess it with a new lid).
Water Bath Canning Time Chart
Timing is a pillar of safe canning. How long you process depends on the recipe, acidity, jar size, and altitude. Below is a rough water bath canning time chart I keep bookmarked. Always compare this with your trusted recipe:
| Food Type | Jar Size | Processing Time | Altitude Adjustment* |
|---|---|---|---|
| Jams / Jellies | ½-pint / pint | 10–15 minutes | +1 min per 1,000 ft |
| Pickles / Relishes | Pint / Quart | 10–20 minutes | +1 min per 1,000 ft |
| Tomato (acidified) | Pint / Quart | 35–45 minutes | +5 min above certain altitudes |
| Fruit (peaches, pears) | Pint / Quart | 20–30 minutes | +5 min per 1,000 ft |
| Salsa | Pint / Quart | 15–25 minutes | +5 min as needed |
*Altitude adjustments: because boiling temperature drops at higher elevations.
Every time I try a new recipe, I check the recommended time and adjust if I’m above ~1,000 ft. Better safe than sorry.
Boiling Water Canning
You’ll often hear the term “boiling water canning”—that is essentially synonymous with water bath canning. The process involves immersing jars in boiling water (212 °F / 100 °C) long enough to drive out air, kill harmful organisms, and create a vacuum seal when cooled.
Because boiling water alone can’t reach extremely high temperatures, this method only works for high-acid foods (pH ≤ 4.6). That means fruits, pickles, jellies, and acidified tomatoes—but not plain vegetables, meat, or soups.
Whenever I explain canning to friends, I like to say: “Boiling water canning is your safest friend when preserving juicy, tangy stuff—but it won’t replace your pressure canner for hearty meals.”
How Long to Water Bath Can Pickles
Pickles are a favorite starting point for many because they’re forgiving, fun, and delicious. If you’re wondering how long to water bath can pickles, here’s what I’ve learned:
- Dill pickles in pint jars: 10–15 minutes
- Bread & Butter pickles in quart jars: up to 15 minutes
- Sliced or chunks: often on the lower end (10 min)
- Whole pickles: toward the higher end (15 min)
If your recipe says “process pints 10 minutes, quarts 15,” go with that—and if you’re at altitude, add time per the adjustment table above.
One tip from experience: don’t overprocess. After the timer goes off, remove jars quickly. Overcooking pickles softens their texture. I once forgot one batch about 5 minutes too long — and those pickles were much less crisp than usual.
My Personal Canning Story & Tips
When I first started, I overfilled jars, forgot headspace, and had two lids that never sealed. Those little failures taught me valuable lessons. Over time, you’ll develop your own rhythm.
A few tips I’ve picked up:
- Work in small batches—don’t fill your largest pot to the brim.
- Keep a kettle of boiled water handy so you can top up your canner if water level drops.
- Make a “canning line” setup: jars, funnel, recipe, tools, cleaning cloth within arm’s reach.
- Always label with contents and date. My kitchen calendar helps me rotate jars during use.
- Keep a canning journal—a simple notebook where I write down what I did each session (jar size, time, altitude, recipe tweaks).
- If a jar fails to seal, don’t despair. Use it first or reprocess immediately.
- Clean up while things cool. Having your workspace clear before your next batch reduces stress.
I’m not perfect—and I still have a jar or two each season that decides not to seal. But the successes far outweigh the flops, and those jars bring joy all year.
Final Words: Your Canning Confidence Begins Now
If you started this post unsure how to water bath can, I hope you now feel ready to fill that first jar with confidence. You’ve seen how water bath canning jars matter, how to pick water bath canning recipes, how to sterilize canning jars, the right water bath canning equipment and supplies, how to seal canning jars, check your time chart, understand boiling water canning, and know how long to water bath can pickles.
Canning is one of those satisfying kitchen rituals where science, patience, and flavor meet. Expect a few hiccups your first few rounds, but treat each failed seal as a lesson rather than a failure. Before you know it, your pantry will hum with colorful jars, each one a testament to your commitment and growing skill.
Go ahead—pick your first recipe (jam, pickles, salsa), gather your jars, and let’s get canning together. I can’t wait to hear how your first “pop” when sealing feels.
Would you like me to craft a companion printable checklist or infographic (with safety warnings, steps, tools) you can share or print? That often helps articles like yours compete stronger.
FAQs
Only high-acid foods such as fruits, jams, pickles, jellies, and acidified tomatoes are safe for water bath canning. Low-acid foods require pressure canning for safety.
If your processing time is over 10 minutes, sterilizing isn’t required since the boiling process sterilizes them. However, many beginners still prefer to pre-sterilize for extra peace of mind.
Pickles usually require 10–15 minutes in a boiling water bath, depending on jar size and recipe. Always adjust for altitude using a reliable chart.
You can reuse glass jars and screw bands as long as they’re in good condition. Flat lids, however, are single-use only and should be replaced each time.
This can happen if rims weren’t cleaned, lids were too tight, or jars weren’t processed long enough. Reprocess immediately or refrigerate and use within a week.
Water bath canning is used for high-acid foods and involves boiling water, while pressure canning reaches higher temperatures for low-acid foods like meats and vegetables.
Properly sealed jars can last 12–18 months in a cool, dark place. For best quality, use them within one year and always check seals before eating.