If there’s one thing I’ve learned after years of raising chicks, it’s that everything begins and ends with chick temperature. You can have the best feed, cleanest bedding, and the cutest brooder setup in the world—but if the temperature isn’t right, your chicks will tell you. They’ll huddle, pant, peep too loud, or worse, fail to thrive.
Getting chick temperature right isn’t about a number on a thermometer—it’s about creating comfort. It’s the gentle warmth that tells them, “You’re safe here.”
Let’s walk through how I build and manage my brooders from week one to six, what tools and methods have worked (and what haven’t), and how you can confidently raise happy, feather-fluffed chicks that grow like they’re supposed to.
Chick Brooder: Building Their First Warm Home
Every new batch of chicks starts with the same thing in my barn—a clean, cozy chick brooder. Think of it as their nursery, where warmth, safety, and space come together.
I’ve tried everything over the years: a galvanized stock tank, a wooden crate, even a big Rubbermaid tote. What matters most isn’t the container—it’s that it’s draft-free, easy to clean, and has enough space for the chicks to spread out.
Here’s my rule of thumb: about 1–2 square feet per chick by week four. If they can’t move away from the heat, it doesn’t matter how perfect your chick temperature is—they’ll still overheat.
I like to divide my brooder into zones: a warm side with the heater and a cool side where the chicks can wander when they’ve had enough. That way, they control their own comfort just like they would under a broody hen.
A simple cardboard shield helps cut drafts at chick level, and a hardware-cloth top keeps curious pets out. Whether you’re brooding five chicks in the laundry room or fifty in a barn, this warm, balanced environment is everything.
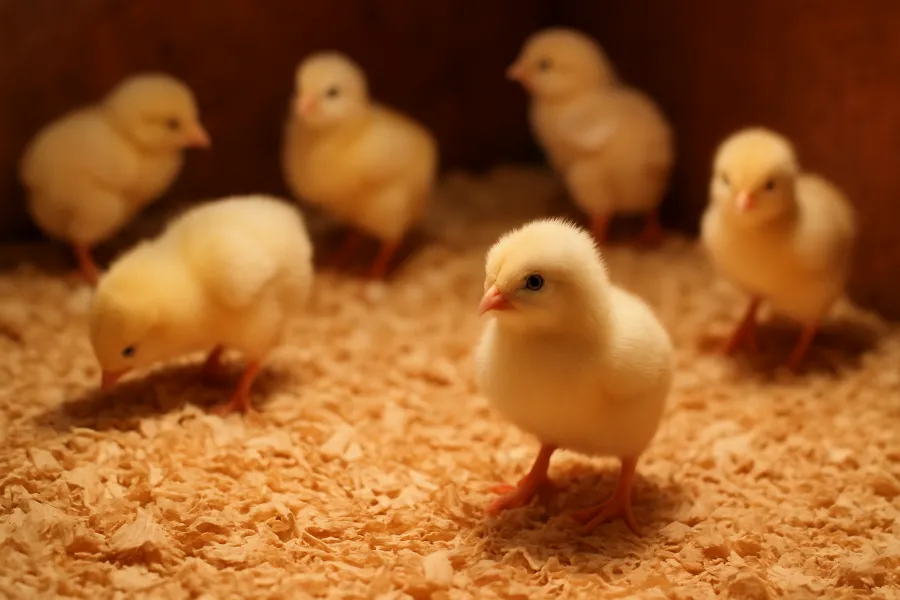
Raising Chicks: Week-by-Week Heat and Heart
When it comes to raising chicks, temperature is your most faithful guide. I follow this simple chick temperature chart week by week, adjusting as the chicks grow:
| Week | Ideal Temperature | Notes |
|---|---|---|
| Week 1 | 95°F (35°C) | Mimics hen’s body warmth. |
| Week 2 | 90°F (32°C) | Drop by 5°F each week. |
| Week 3 | 85°F (29°C) | They’ll feather fast—watch behavior. |
| Week 4 | 80°F (27°C) | Less dependent on heat. |
| Week 5 | 75°F (24°C) | Start weaning off supplemental warmth. |
| Week 6 | 70°F (21°C) | Fully feathered—ambient temp is fine. |
What I love most about chicks is how honest they are. They’ll show you what they need.
- If they’re cold, they’ll pile together, peeping loud enough to make you run.
- If they’re hot, they’ll pant, spread wings, and hug the edges.
- When the chick temperature is perfect, you’ll hear that soft, steady hum of contentment—a sound every chicken keeper learns to love.
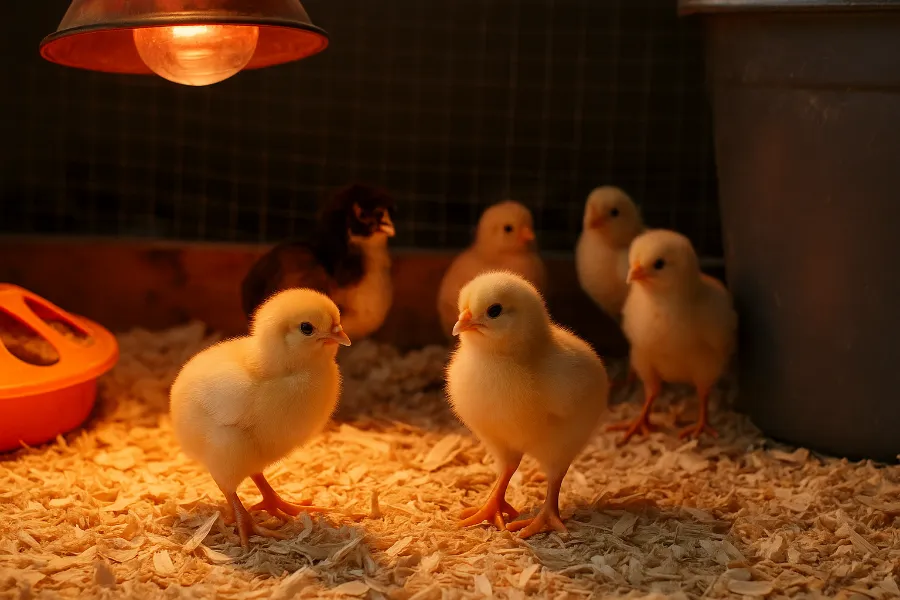
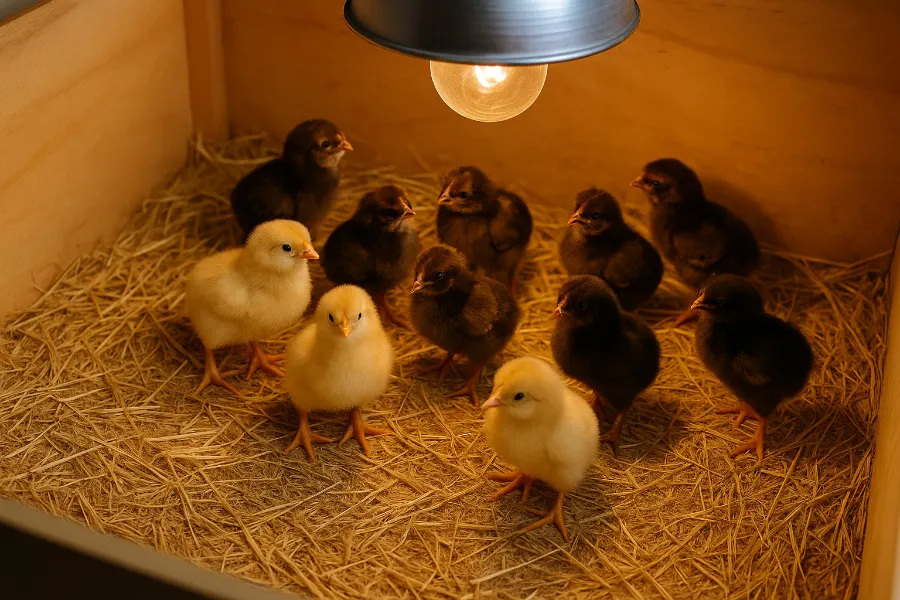
Heat Lamp for Chicks: The Classic Method That Still Works
Before I ever bought a fancy brooder plate or thermostat, I relied on a heat lamp for chicks—and truthfully, I still keep one as backup.
The heat lamp is the old-school way: a 125–250-watt bulb (usually red) hanging above the brooder, radiating warmth downward. You adjust it by raising or lowering the lamp or using a dimmer switch.
Here’s what I’ve learned through trial and error:
Pros
- Super affordable and easy to find anywhere.
- Heats up fast and covers large areas.
- Great for garages or barns in colder months.
Cons
- They can overheat chicks fast.
- Bulbs burn out suddenly (always keep extras).
- Most importantly—fire risk. A loose clamp or falling lamp can cause disaster.
That said, when used safely, they do the job. I always secure mine with both a clamp and chain, keep it 18–24 inches above the bedding, and check the brooder temp several times a day.
For beginners, a heat lamp is often the easiest and cheapest way to hit that perfect chick temperature—you just have to babysit it a little more closely.
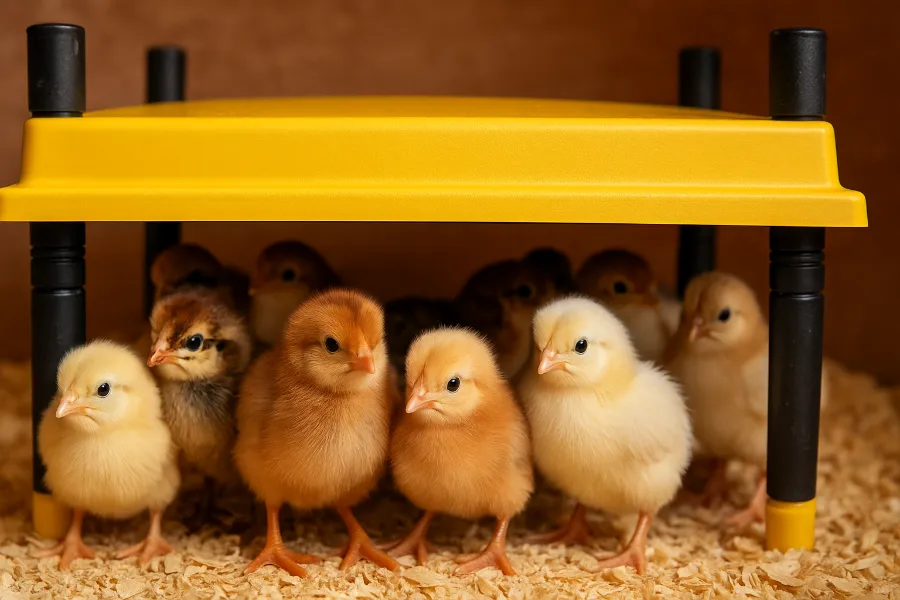
Chick Heat Plate: My Favorite “Modern Hen”
If the heat lamp is the old faithful, the chick heat plate is the modern upgrade.
I made the switch a few years ago, and honestly, I’ll never go back for small indoor broods. It’s a low-wattage, flat heating surface on adjustable legs that chicks crawl under like they would a mama hen. The underside stays at around 95°F, and they come and go as they please.
Here’s why I’m hooked:
- It’s silent—no humming or flickering light.
- It’s safe—no exposed bulb, no fire risk.
- It’s energy-efficient, running for pennies a day.
You just have to adjust the height weekly as they grow. By week two, I start raising the plate slightly so they have to duck a little to get under it.
There’s something so natural about seeing them toddle in and out, warm and sleepy, just like a real brood under a hen. It also helps them feather faster, which means they outgrow the brooder sooner.
If you’re brooding indoors—or if safety gives you anxiety—a chick heat plate is worth every penny.
Chick Heater: New Gadgets That Make Brooding Easier
Not everyone realizes how many new chick heater options there are now. Beyond lamps and plates, you can find tools that keep your brooder perfectly stable, no matter the season.
Some of my favorites include:
- Ceramic Heat Emitters (CHEs): Screw into a lamp fixture but emit heat only (no light). I love them for nighttime because chicks get darkness, not glare.
- Oil-filled Radiator Heaters: Ideal for large brooders or garages. They heat the space gently without hot spots or exposed flames.
- Smart Thermostats: Plug your heater into one of these, and it’ll cycle on and off automatically to hold steady chick temperature.
For anyone brooding through winter or in drafty sheds, these tools can be a game-changer. My own brooder setup has evolved from “hope for the best” to “set and forget,” and it’s a huge relief.
Chick Bedding: The Unsung Hero of a Warm Brooder
When it comes to holding heat and keeping chicks cozy, chick bedding plays a bigger role than most people think.
I’ve tested just about everything: pine shavings, hemp, straw, paper pellets—you name it. Here’s what’s worked best for maintaining warmth and hygiene.
My go-to choices:
- Pine shavings: Inexpensive, absorbent, and soft. Perfect all-around bedding.
- Hemp bedding: More costly but controls odor and dust incredibly well.
- Chopped straw: Great in dry climates, but not so much in damp spaces.
Never use newspaper—it’s too slick and can cause leg injuries. For the first few days, I line the brooder floor with rubber shelf liner or paper towels so the chicks don’t slip and can find food easily.
Clean, dry bedding helps maintain a steady chick temperature by keeping the air dry and insulating from below. Wet litter chills chicks faster than you’d expect, especially at night.
Monitoring Chick Temperature the Smart Way
The secret to maintaining perfect chick temperature is consistency. Thermometers are helpful, but your best tools are your eyes and ears.
That said, these gadgets make my life easier:
- Digital probe thermometer: Keeps readings right where chicks stand.
- Infrared thermometer gun: Great for spot-checking the bedding surface.
- Max/min thermometer: Tells you how much the temperature fluctuated overnight.
- Plug-in thermostat controller: Automatically cycles heat sources on/off to stay in range.
If you’re out during the day, these simple tools prevent sudden drops or spikes that can stress chicks. The goal is steady, predictable warmth—not extremes.
The Balance Between Heat and Airflow
It’s tempting to seal the brooder tight to “keep the heat in,” but fresh air matters too. Warm, damp air can cause respiratory issues and increase ammonia.
I always keep small vents or a mesh top to allow airflow without drafts. The air should smell clean and slightly warm, not stuffy or sharp. Fresh bedding and good ventilation do as much for chick health as perfect temperature does.
Week-by-Week: How I Adjust the Brooder Temperature
Week 1 — Cozy Beginnings (95°F)
That first night, I’m glued to the brooder. I hover, I check, I listen. If they’re calm and evenly spread out, I can finally breathe.
Week 2 — Settling In (90°F)
They start flapping and exploring. I lower the lamp wattage or raise the plate a little. More space, more confidence.
Week 3 — The Playful Stage (85°F)
They’re feathering fast now. I start spacing out feeders and perches so they can move more.
Week 4 — Almost Grown (80°F)
By now, they spend most of their time outside the warm zone. If the weather’s mild, I turn off heat during the day.
Week 5 — Getting Independent (75°F)
They barely need the heater anymore. I start prepping the outdoor coop.
Week 6 — Graduation (70°F)
Fully feathered, eating like tiny machines, and ready for the big world. There’s always a moment of pride watching them take that first step outdoors.
My Daily Brooder Routine
Morning:
I check temperatures at both ends of the brooder, refresh water, and scatter fresh feed.
Afternoon:
I spot-clean the bedding, adjust lamp height if needed, and listen for contented peeps.
Evening:
I double-check for drafts and review my thermometer’s highs and lows. By week two, it’s second nature.
Consistency—day after day—is what keeps their growth steady and stress-free.
Transitioning from Brooder to Coop
When nighttime temperatures stay above 50°F and the chicks are fully feathered, I start letting them explore outdoors. First for an hour, then a few hours, then all day.
They’ll always return to the warmest spot, so I still bring them in at night for a few days until I know they can handle it. That transition is smoother when they’ve had steady chick temperature and healthy feather growth from the start.
Reflections on Raising Chicks and Getting the Temperature Right
I’ve made mistakes—too much heat, not enough heat, lamps that burned out at midnight. Every flock teaches you something new. But over time, I’ve realized this: keeping chicks warm isn’t just about numbers—it’s about rhythm.
When you watch them respond to your care, when you hear that gentle contented peeping, you’ll know you’ve got it right. Perfect chick temperature feels less like science and more like instinct—but backed by the right tools, it’s a skill anyone can master.
So whether you’re using a heat lamp for chicks, a chick heat plate, or a fancy chick heater, remember this simple truth: warmth is comfort, comfort is growth, and growth is the beginning of every healthy flock.
FAQs
Newly hatched chicks need a temperature of about 95°F (35°C) during their first week. Gradually lower it by 5°F each week until they’re fully feathered.
Cold chicks huddle and chirp loudly, while hot chicks pant and avoid the heat source. The right chick temperature keeps them calm and evenly spread out.
A heat lamp hangs above the brooder and emits radiant heat, while a chick heat plate warms from below like a hen’s body. Heat plates are safer and more energy-efficient.
Most chicks need extra warmth for about six weeks. Once they’re fully feathered and comfortable at room temperature, heat can be removed.
Pine shavings and hemp bedding work best—they insulate well and stay dry. Avoid newspaper, which is slippery and doesn’t hold warmth.
Yes, but it takes careful planning. You’ll need heavy insulation, deep bedding, and sometimes a broody hen to maintain warmth naturally.
In the first week, check several times daily. After the second week, twice a day is enough to ensure consistent warmth and comfort.