I still remember that first summer I tried preserving tomatoes: I had a big pot bubbling, jars everywhere, and zero idea how critical the sterilization step really was. Over time, I learned that how to sterilize mason jars for canning is one of the most important parts of safe, beautiful preserving. It’s not glamorous, but it sets you up for success.
Today I want to walk you through everything I do — the methods, the tools, the little unsung tricks — so your jars end up spotless, sealed, and safe. We’ll cover everything from boiling water to steam, ovens to lids, and even pressure canning safety.
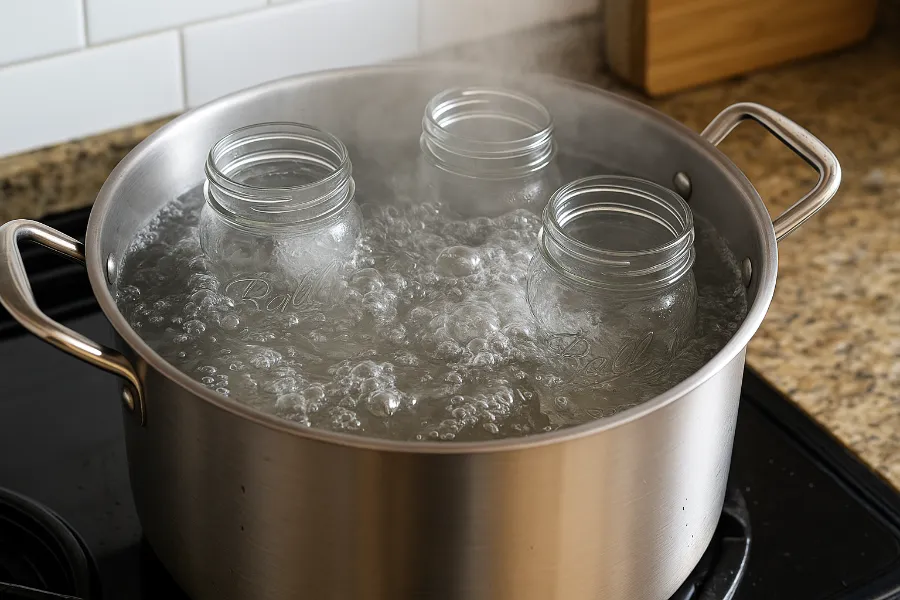
How to Sterilize Canning Jars (with Boiling Water)
This is still my “go-to” when I’m canning jam, tomato sauce, or anything acidic. Boiling water is simple, reliable, and doesn’t require exotic tools.
Here’s my step-by-step process:
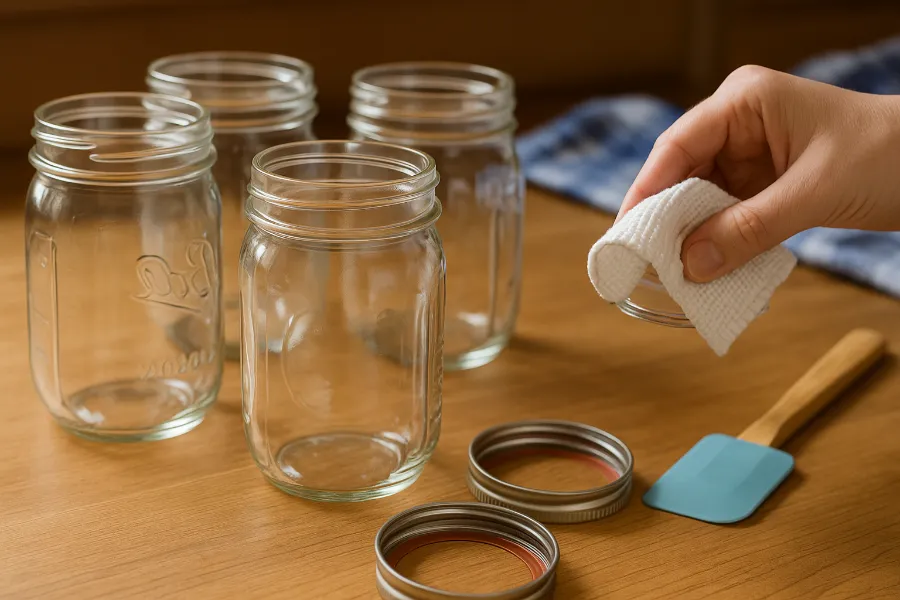
- Wash your jars, lids, and bands thoroughly in hot, soapy water. Rinse well.
- Place the jars upright (mouth up) in a large stockpot or water bath canner.
- Fill with water until jars are covered by at least 1 inch of water.
- Bring it all to a rolling boil (212 °F / 100 °C).
- Boil for 10 minutes (plus add 1 minute per 1,000 ft of altitude).
- Use a jar lifter to remove jars and set them upside down on a clean towel or rack (still hot).
- Keep them hot until you fill them — don’t let them cool too much.
This method is safe for most canning jars and remains the trusted standard for many home preservers.
How to Sterilize Jars and Lids for Canning
It’s not enough to only sterilize the jars — you also need to treat your lids and bands properly so the whole system is clean and safe.
Lids (Flat Sealing Discs):
- Never boil lids harshly — the heat can damage the sealing compound. Instead, warm them in hot water (not boiling) — around 180–190 °F — for 10 minutes, just enough to soften the rubber ring.
- Use sanitized tongs or a magnetic lid lifter to handle them so you don’t touch the sealing surface.
Bands (Rings):
- Bands are less critical, but wash them with hot, soapy water and dry thoroughly. They don’t need the same sterilization rigor as lids and jars, but cleanliness is essential.
When I’m in full preserve mode, I keep the jars, lids, and bands in separate, very clean zones so nothing contaminates the rim or seal surfaces.
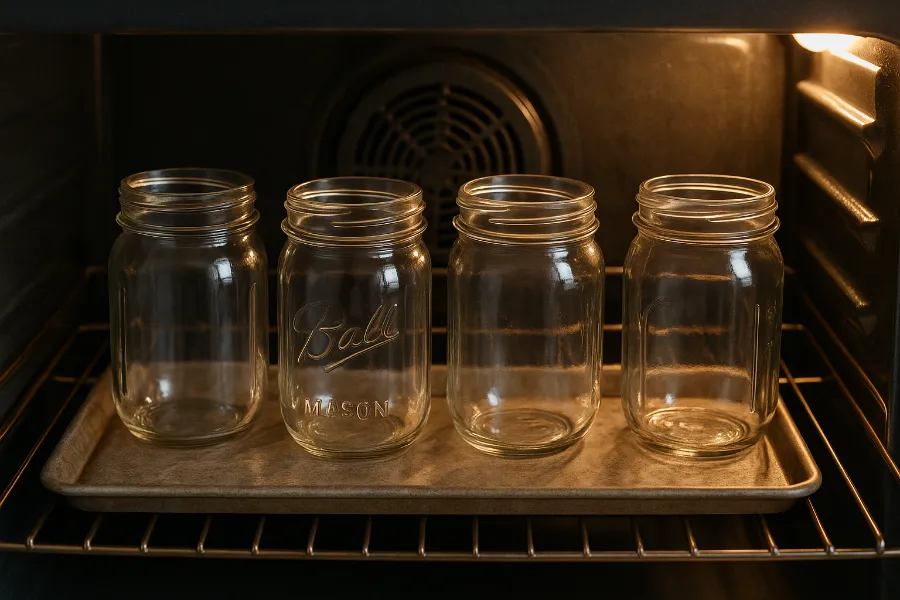
Sterilizing Jars in Oven
On large canning days, I sometimes turn to the oven method because my stovetop is already crowded. It’s elegant and works well when done carefully.
Here’s how I do sterilizing jars in oven:
- Preheat oven to 225 °F (107 °C).
- Wash jars in hot, soapy water and rinse thoroughly.
- Place jars (without lids) upright on a metal baking sheet or rack.
- Bake for 20 minutes.
- Leave jars in the oven until you’re ready to fill.
The advantage is having dry jars — no drips inside — and it frees your burners for cooking the preserves.
But a few caveats:
- Never drop cold jars into a hot oven (thermal shock risk).
- The oven method is best for jams, jellies, or sauces you’ll pour in while hot.
Steam Sterilization
If you have a steam canner or multi-tier steamer, steam sterilization is a favorite of mine. It’s fast, uses less water, and is efficient.
Here’s how I use steam:
- Place cleaned jars on the rack inside your steam canner.
- Add water to just below the jar bottoms.
- Seal the lid or cover, bring it to steam.
- Let jars steam for 10 minutes.
- Keep the lid on until filling time.
Steam reaches the same sterilization temperature (212 °F) but uses less energy. Because it’s contained, jars stay clean longer.
Sterilization Process: Time, Temperature & Logic
To me, understanding the sterilization process helps keep mistakes out of your kitchen. It’s not just about boiling; it’s about how heat, time, and method come together.
- Temperature: Typically, you need to hit 212 °F (100 °C) to kill most bacteria, molds, and yeasts.
- Time: Beyond reaching that temp, you need to sustain it (10 minutes is the usual standard for many jars).
- Altitude: At higher elevations, water boils at lower temps, so you increase time or pressure accordingly.
- Method choice: Boiling, steam, or dry heat — all aim to deliver enough heat and time to sterilize. The method you pick depends on your gear, batch size, or kitchen constraints.
I always keep in mind that even a perfect jar can be compromised if it sits too long before filling — dust, airborne spores, or handling can undo your work.
Sterilization Temperature
You’ll see sterilization temperature mentioned often in canning guides — here’s how I approach it:
- 212 °F (100 °C): The classic boiling point of water — the benchmark for sterilizing jars with boiling water or steam.
- Below 180 °F: Useful for enzyme inactivation but not full sterilization.
- Above 225 °F (oven method): Works in dry heat, but you must be consistent and careful — and your jars must be able to handle that temperature.
A good rule of thumb: always choose a method you can control and monitor reliably.
Sterilizing Techniques: Picking What Works for You
Here’s the toolbox of sterilizing techniques I rotate through, depending on batch size, kitchen layout, and energy:
- Boiling water bath — the workhorse method. Reliable, familiar, and often regarded as the gold standard.
- Steam sterilization — fast, water-saving, and efficient.
- Oven (dry heat) — frees up stovetop and gives dry jars.
- Dishwasher (hot cycle) — usable as a pre-sterilizing step, but I don’t rely solely on it for critical jars.
- Pressure sterilization (for low-acid foods) — sterilization is built into the process itself.
Each technique has trade-offs (time, water use, convenience). Over years, I’ve learned which method fits which canning day.
Pressure Canning Safety
Whenever I’m working with low-acid foods (like vegetables, meat, soups), pressure canning safety is non-negotiable. Botulism spores won’t die at 212 °F — you need higher heat, which is only possible in a sealed, pressurized environment.
Here’s how I handle it safely:
- Use jars rated for pressure canning (most standard Mason jars are fine).
- Always check the gasket, vent pipe, and sealables on your pressure canner.
- Pre-sterilization of jars is optional here because the process itself sterilizes if done properly.
- Follow the tested recipe for time and pressure exactly — no guessing.
- Never re-use flat metal lids for pressure canning.
I usually don’t pre-boil jars in my pressure canning batches the heat and pressure inside do that job for me.
How to Sterilize Jars for Pickling
Pickles are one of my favorite preserves because they’re fast, tangy, and fun. But they’re also acidic, which means I can take advantage of simpler sterilization. Here’s how I handle how to sterilize jars for pickling:
- Clean everything (jars, lids, tools) in hot, soapy water. Rinse well.
- Submerge jars in boiling water for 10 minutes (plus altitude adjustment).
- Warm lids in hot (not boiling) water as described above.
- Drain jars upside-down on a clean towel or rack.
- Fill with hot brine and produce quickly.
Because pickling brine is acidic, your jars will already be in a hostile environment for bacteria — but starting with sterilized jars gives extra margin and clarity to your pickles.
Sterilizing Lids for Canning
You know how the seal is what turns a jar into a can? That seal is only as good as your lid preparation. Here’s my approach to sterilizing lids for canning:
- Warm the lids in ~180 °F water for about 10 minutes.
- Use sanitized tongs or magnetic tools to lift them.
- Never touch the underside or the sealing surface.
- Keep them in a clean, covered bowl until it’s time to seal the jars.
Always use new lids each season — reusing old ones may lead to seal failure or contamination.
Extra Notes, Tips & Mistakes I’ve Learned (So You Don’t Have To)
Over the years, I’ve learned a few small but important things that make a big difference:
- Don’t let jars sit too long — if more than an hour passes before filling, re-sterilize or keep them covered and hot.
- Avoid touching rim interiors — use clean tools to handle jars after sterilization.
- Inspect for cracks or chips — even tiny damage can cause a jar to break or fail to seal.
- Wipe rims before sealing — a stray bit of jam or brine will ruin your seal.
- Don’t overtighten bands — screw them fingertip tight so gas can escape during processing.
- Let jars cool naturally & undisturbed — don’t move or tilt them.
- Recheck failed jars — if a jar doesn’t seal, reprocess or refrigerate.
- Adjust for altitude — always check local advice for extra boil time or pressure.
- Label and date — refrigeration and shelf life matter.
Also, don’t neglect your workspace. I always wipe down counters with a mild sanitizer and keep fans off — dust is your enemy during this step.
Final Thoughts: From My Kitchen to Yours
I truly believe that mastering the question how to sterilize mason jars for canning is a rite of passage in home preserving. Once you understand the why behind the how — temperature, time, control — you can flex your method to your space, climate, and batch size.
Whether you stick to the boiler, experiment with steam, or occasionally use your oven, the goal remains: clean, hot jars, clean lids, quick filling, and a tight seal. Every jar that ends up in your pantry is a proud little milestone — a gift of summer, preserved for winter.
FAQs
Yes. Sterilizing jars removes bacteria, mold, and yeast that can spoil your preserves. It ensures your food stays safe and shelf-stable for months.
Boil jars fully submerged in water for 10 minutes. If you live above 1,000 feet, add one extra minute for every 1,000 feet of elevation.
Yes, you can. Heat clean jars at 225°F (107°C) for 20 minutes, then keep them hot until ready to fill. Avoid placing cold jars directly into a hot oven.
The ideal sterilization temperature is 212°F (100°C). This kills bacteria and mold, making your jars safe for canning.
Yes. Wash bands well and warm lids in hot (not boiling) water at about 180°F for 10 minutes to soften the rubber seal and remove residue.
Steam sterilization works just as effectively as boiling but uses less water. It’s great for quick, energy-efficient jar preparation.
If your recipe is processed for more than 10 minutes or pressure canned, the heat will sterilize the jars during canning. For quick pickling, pre-sterilization is still recommended.