I still remember the day I switched from hand-milking my first doe to using a goat milking machine. It felt like crossing a line — would I lose that bond, that rhythm, that familiar sound of milk hitting the pail? But what I gained changed everything: more time, cleaner milk, and happier goats.
Over the years, I’ve fine-tuned a daily goat milking routine that balances old-fashioned care with modern efficiency. Whether you’re milking one family doe or running a growing dairy herd, understanding your goat milking equipment, maintaining proper goat milking supplies, and setting up a reliable goat milking stand make all the difference.
In this post, I’ll share how I milk my goats step-by-step — from prepping the stand and supplies, to using the machine correctly, to keeping milk fresh and clean. I’ll also cover the do’s and don’ts, advantages and disadvantages, and how to choose the best gear from traditional to modern.
My Daily Goat Milking Routine
Before diving into the gear and tools, here’s a quick look at how my daily routine runs — smooth, steady, and repeatable every single morning.
- Gather everything: All goat milking equipment, clean towels, machine parts, and sanitizing supplies.
- Call in the goat: She walks onto the goat milking stand and locks into her head gate.
- Clean the udder: Warm water and soft towels to wash and dry.
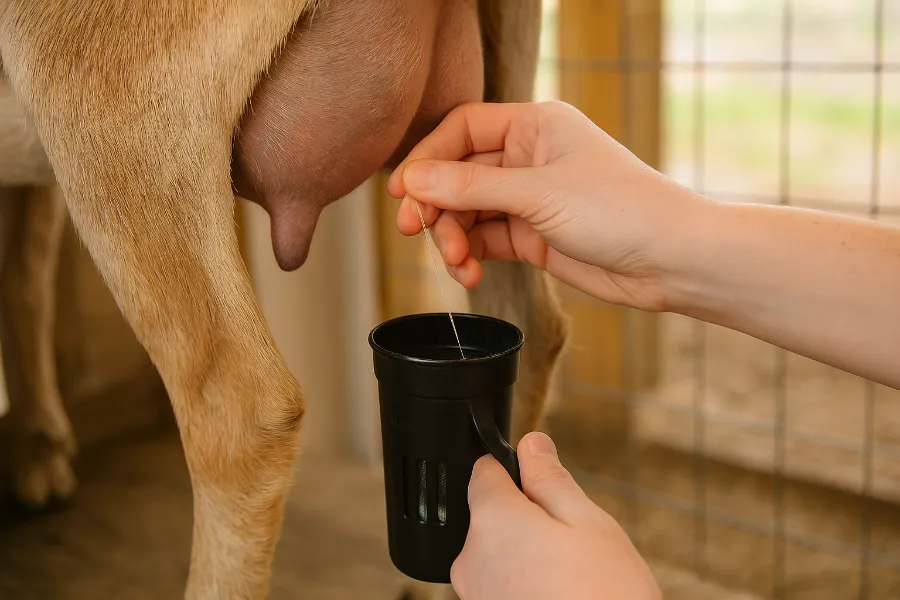
- Test first milk: The first few streams go into a strip cup — never the main bucket.
- Attach the goat milking machine: Gentle suction, smooth rhythm, calm goat.
- Dip and care for teats: Teat dip and balm after milking to prevent infection.
- Filter and chill milk immediately.
- Clean all milking supplies and equipment before storing.
It’s not just a list — it’s a habit. The goats know the flow. So do I. And that’s what keeps our mornings peaceful.
The Importance of a Goat Milking Stand
The goat milking stand is the anchor of any setup — whether you milk by hand or use a machine. Before I had one, milking was chaos. Once I built my first stand, everything changed.
A proper stand provides stability, height, and routine. My goats jump up willingly now because they know exactly what’s coming — feed, relief, and care.
What makes a good goat milking stand:
- Sturdy wooden or metal construction
- Comfortable working height (saves your back!)
- Secure head gate to keep the goat steady
- Non-slip surface for safety
- Optional feed tray to keep her calm
The stand becomes a signal to your herd — a structured space that tells them, “It’s milking time.” Whether you build your own or buy a prefabricated model, make it part of your permanent milking station.
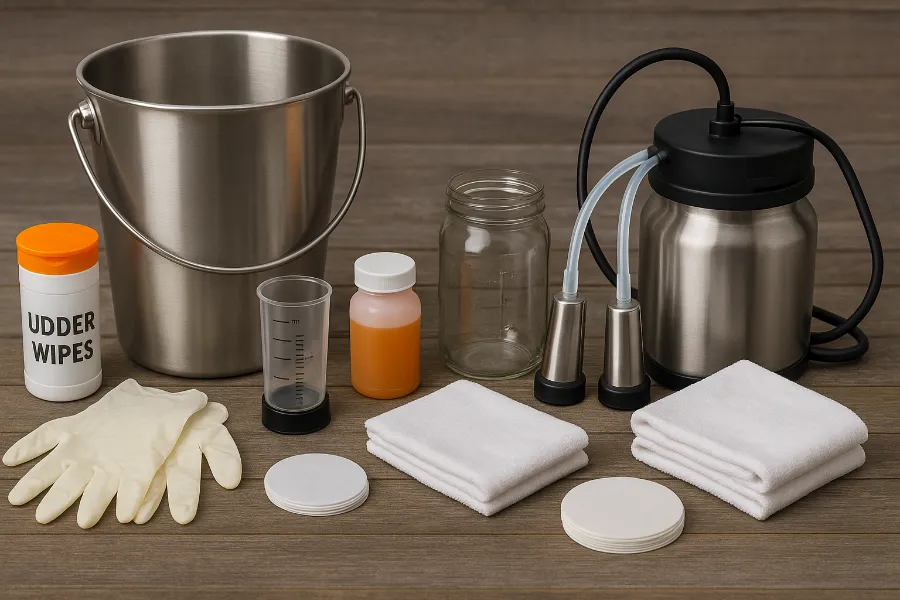
Goat Milking Equipment: What You’ll Need for Every Session
Once your stand is in place, the next step is to gather your goat milking equipment. The right tools make all the difference between frustration and flow.
Essential Equipment Checklist
| Item | Purpose |
|---|---|
| Stainless steel bucket or pail | Durable, easy to sanitize, and long-lasting |
| Strip cup | For testing the first milk for clots or discoloration |
| Udder wash or wipes | Keeps udders clean before milking |
| Clean towels | Separate cloths for washing and drying |
| Teat dip (iodine or chlorhexidine) | Prevents infection before and after milking |
| Milking machine or hand pail | Extracts milk — your main tool |
| Filters or strainers | Removes debris before storage |
| Storage jars or milk can | For chilled, clean milk |
| Gloves (optional) | Keeps hands and milk sanitary |
If you’re using a goat milking machine, make sure it has:
- Food-grade silicone tubing
- Stainless steel collection tank
- Adjustable suction pressure
- Easy-to-clean teat cups
- Reliable pulsation control
Every item you use should be washable, durable, and safe for food contact. Cheap materials save money short term but cost milk quality long term.
Goat Milking Supplies: Keeping It Clean and Consistent
Your goat milking supplies are your hygiene foundation. Without them, even the best machine won’t help you get quality milk.
Daily must-have milking supplies:
- Mild udder wash (warm water + vinegar or gentle soap)
- Disposable or cloth towels
- Food-grade sanitizer
- Teat dip solution
- Paper filters or milk strainers
- Ice bath setup for rapid milk cooling
- Glass jars or stainless steel containers for storage
Keep everything stored in one clean tote or cabinet — dust and barn smells can contaminate milk faster than you think. After milking, always wash and air-dry all your supplies before putting them away.
Step-by-Step: My Goat Milking Machine Routine
Here’s how I run my full routine every morning — a blend of machine precision and personal care.
Step 1: Preparation
Before the goats even leave the pen, I sanitize my goat milking equipment and check that my goat milking machine hoses, liners, and seals are clean and secure.
I also set out clean towels, teat dip, my strip cup, and a few treats for the girls. The key is to have everything within arm’s reach before milking begins.
Step 2: Getting the Goat on the Stand
I open the pen gate and call one doe at a time. She knows her name, her spot, and her reward. Once she’s in the milking stand, I secure the head gate and let her settle with a scoop of grain.
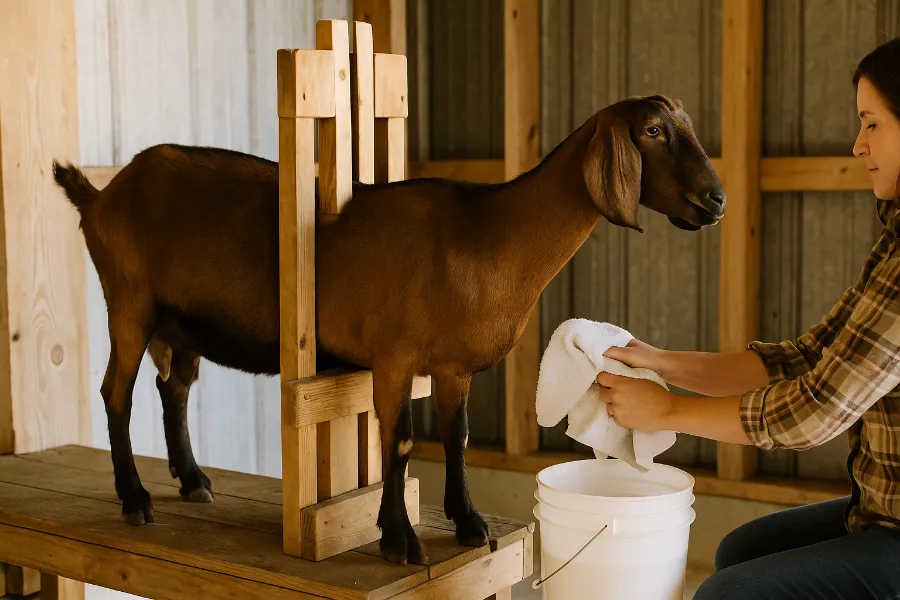
Step 3: Cleaning the Udder
I use a warm damp cloth or udder wipe to gently clean dirt, dust, or hair from the udder and teats. Then I dry thoroughly with a fresh towel. Never milk on a damp udder — moisture attracts bacteria.
Step 4: Strip Test
I milk the first few squirts into a strip cup and check for any signs of mastitis — clumps, watery milk, or discoloration. If it’s clear, I move on to full milking.
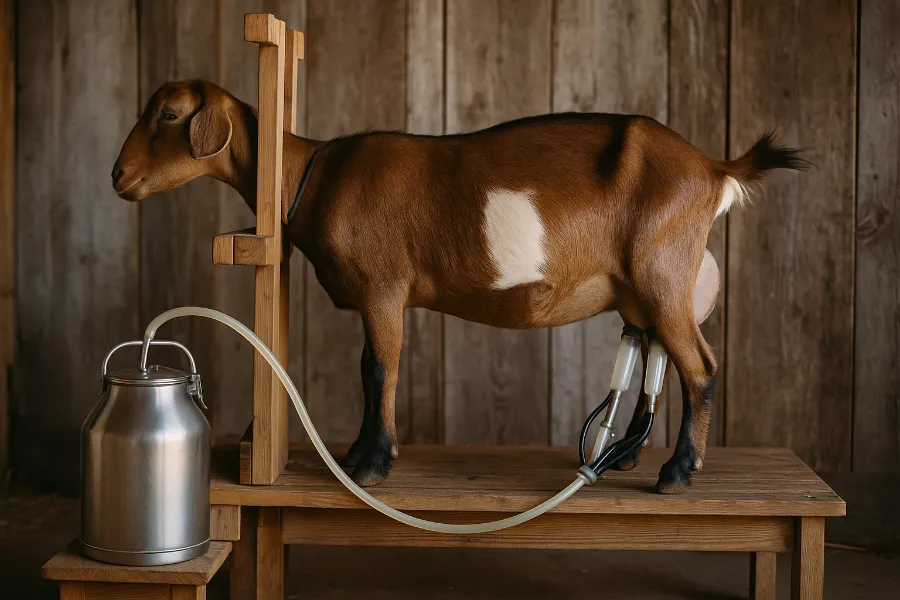
Step 5: Using the Goat Milking Machine
I attach the teat cups carefully, ensuring even suction on both teats. The hum of the machine is steady but gentle. Within a few minutes, milk begins to flow, and the goat relaxes completely.
When the stream slows, I gently remove the cups, releasing the pressure slowly so as not to irritate the udder. I check the udder with a light touch to confirm it’s fully emptied.
Step 6: Post-Milking Care
I dip each teat in antiseptic solution and massage a little udder balm if the skin feels dry. Then I release the goat and call the next one forward.
Step 7: Filtering and Cooling
I filter the milk immediately through a paper or mesh filter into a stainless steel pail. Then I place it in an ice bath for rapid cooling before transferring it to glass jars in the fridge.
Step 8: Cleaning the Equipment
This step is sacred. I rinse all hoses, cups, and pails with lukewarm water first, then wash with dairy-safe detergent, rinse again, and air-dry upside down.
Once a week, I deep-clean the system — disassembling every part to sanitize with vinegar and warm water.
Traditional vs. Modern Milking Methods
Both hand-milking and machine milking have their place — I’ve done both extensively, and here’s what I’ve learned.
| Aspect | Hand Milking | Goat Milking Machine |
|---|---|---|
| Cost | Minimal setup | Higher initial investment |
| Speed | Slower (6–10 min per goat) | Faster (3–5 min per goat) |
| Hygiene | Depends on your technique | Easier to maintain consistency |
| Effort | Requires hand strength and time | Low physical effort |
| Learning Curve | Simple | Moderate (setup & cleaning) |
| Best For | 1–3 goats | 4+ goats or busy routines |
Personally, I recommend starting with hand-milking to learn your goats’ anatomy and milk flow. Then, as your herd grows or your hands start aching, invest in a goat milking machine. It’s not a loss of tradition — it’s an upgrade in sustainability.
The Do’s and Don’ts of Goat Milking
Do:
- Milk at the same times daily — goats thrive on routine.
- Clean the udder before and after every session.
- Sanitize your goat milking equipment daily.
- Keep milking areas quiet and stress-free.
- Cool milk to 40°F (4°C) within 30 minutes.
- Track yields and goat health regularly.
Don’t:
- Use dirty towels or unwashed pails.
- Skip the post-milking teat dip.
- Leave milk sitting out warm.
- Ignore signs of mastitis or swelling.
- Rush cleaning your goat milking supplies — bacteria love moisture.
Advantages and Disadvantages of a Goat Milking Machine
Advantages:
- Saves time — perfect for multiple goats.
- Provides steady, gentle suction that’s easier on udders.
- Keeps milk cleaner with less exposure to debris.
- Reduces wrist and hand strain.
- Allows for more consistent yields.
- Improves hygiene and safety overall.
Disadvantages:
- Initial cost (quality systems start around $400–$800).
- Requires careful cleaning after every use.
- Noise can scare young or nervous goats at first.
- Needs power (manual models exist but are slower).
After trying both methods for years, I’d never go back entirely to hand-milking. The goat milking machine lets me focus on care, not just chores.
Choosing the Right Goat Milking Machine
If you’re new to machine milking, here’s what I’ve learned about picking a good one:
- Capacity: Start with a single-goat portable unit if you have a small herd.
- Material: Stainless steel and food-grade silicone are best.
- Adjustable suction: Prevents teat damage.
- Quiet operation: Goats relax more with less noise.
- Easy disassembly: Every part should come apart for cleaning.
- Parts availability: Always have spare liners, gaskets, and tubing on hand.
A reliable mid-range portable model is often more than enough for small farms. I always say: buy once, cry once — and your goats will thank you.
Balancing Tradition and Technology
Hand-milking is heritage; machine milking is progress. But one doesn’t cancel out the other.
Your goats don’t care what you use — they care how you treat them. Whether your hands do the work or your goat milking machine hums along, the real secret is patience, cleanliness, and consistency.
For me, it’s a mix of both worlds. I still hand-milk my youngest doe sometimes just to stay in touch with the rhythm. But when the barn is busy, the machine takes over — and my milk stays just as sweet.
Final Thoughts: Clean Milk, Calm Goats, and Confidence in Routine
The best dairy routines don’t happen overnight. They grow from small, consistent habits — and from learning what works for you and your herd.
Start simple: a sturdy goat milking stand, a few basic goat milking supplies, and a reliable goat milking machine when you’re ready. Keep everything spotless, stay gentle with your goats, and never rush the process.
That’s the real beauty of homesteading — blending tradition with tools that make life easier, milk cleaner, and mornings calmer.
FAQs
A goat milking machine uses gentle suction through teat cups to extract milk efficiently and hygienically. It mimics hand-milking but saves time, reduces strain, and improves consistency in your daily milking routine.
Yes, most modern goat milking machines are beginner-friendly. Start slow, read your goat’s comfort cues, and clean all parts thoroughly after each use for the best results.
Absolutely. A goat milking stand keeps your goat stable and calm during milking, allowing you to attach and remove the machine safely without stress or spills.
All goat milking equipment and goat milking supplies should be cleaned and sanitized after every milking session. Weekly deep cleaning prevents buildup and ensures milk stays pure and safe.
It saves time, reduces wrist strain, and provides cleaner milk with less contamination. For larger herds, it’s a game-changer that maintains consistent production.
The main drawbacks are higher initial cost and regular maintenance needs. However, proper cleaning and routine care easily offset those challenges.
For many herds, yes — but it depends on your preference. Some keepers still hand-milk occasionally for bonding or when power isn’t available, blending traditional and modern methods.