The first time I tried milking a goat without a stand, I ended up with more milk on my jeans than in the bucket. That day, I learned a truth every homesteader eventually discovers — a good goat milking stand isn’t optional. It’s essential.
If you’ve got dairy goats, or even just one stubborn doe, building your own milking stand will change everything about your morning routine. It keeps your goat calm, saves your back, and makes goat milking a peaceful, productive ritual instead of a daily wrestling match.
Today, I’m going to walk you through exactly how to build a goat milking stand — with the tools, materials, dos and don’ts, and honest pros and cons from my own experience in the barnyard.
Milking Stand: Why It’s the Heart of Every Barn
You don’t truly appreciate a milking stand until you’ve tried milking on the ground — balancing your bucket while your goat dances around like she’s auditioning for a rodeo. A good stand changes that completely.
It’s a simple piece of goat equipment, but it’s the backbone of every small dairy setup. It does three vital things:
- Keeps the goat still and safe
- Raises her to a comfortable height for you
- Creates a consistent, calm milking environment
When goats know what to expect, they relax. When you’re not crouched in the dirt, you do too. That’s how the magic happens — rhythm, comfort, and trust.
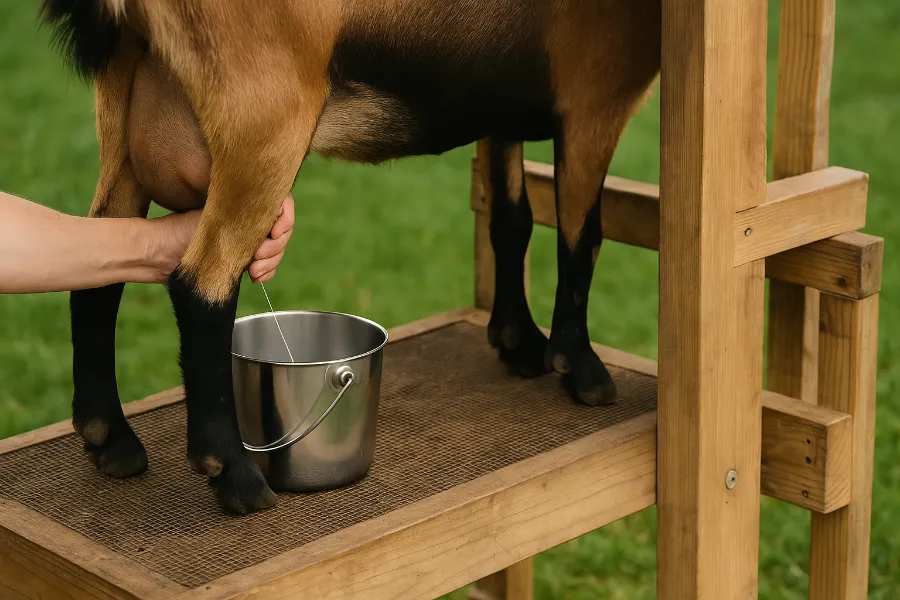
Goat Milking: Turning Chaos into Calm
If you’re new to goat milking, you might assume patience is the hardest part. But truthfully, it’s setup. Milking in a cramped, awkward space makes everything harder — for you and your goat.
A sturdy goat milking stand turns the chore into a ritual. I like to set up my station near the window, where the morning light filters in. I bring out a small pan of sweet feed, a clean pail, and a warm cloth. As soon as my doe hops up, the barn gets quiet. It’s our time — the hum of the day hasn’t started yet, and there’s something grounding about that rhythm.
A milking stand isn’t just for milking either. I use it for brushing, trimming hooves, and even routine vet checks. It’s a small project that makes a massive difference in daily goat care.
Goat Equipment: What You’ll Need to Build a Milking Stand
You don’t need fancy tools or carpentry experience to build your own goat milking stand. Just a few solid boards, a Saturday afternoon, and a willingness to measure twice.
Materials:
- (2) 2×6 boards (8 feet long) – platform decking
- (1) 2×4 board (8 feet long) – frame
- (2) 4×4 posts (3 feet tall) – headgate supports
- (1) sheet of ¾-inch plywood – optional top
- (1) 1×4 board – headgate slats
- (1) ⅜-inch carriage bolt, 4–6 inches – pivot point
- (1) latch or hook – headgate closure
- (1) small bucket or feed bowl – for the front tray
- 12–16 wood screws, 2½–3 inches long
- Wood sealant, paint, or linseed oil – for weather protection
Tools:
- Drill with bits
- Saw (hand or circular)
- Tape measure and carpenter’s square
- Screwdriver
- Sandpaper (medium grit)
- Level
Optional upgrades: non-slip rubber mats, casters, hinges (for folding), or a ramp for older goats.

Dairy Goats: Size, Comfort, and Setup Tips
The beauty of a DIY milking stand is that you can adjust it to your herd. Dairy goats come in all shapes and personalities — my Nigerians are little gymnasts, while my Nubians act like divas who want a spa day every time they’re milked.
Here’s what works for most breeds:
- Platform: 48″ long × 20″ wide
- Height: 16–18″ from the ground
- Headgate space: 4–5″ at the bottom, wider at the top
I prefer stands about mid-thigh height. It’s easier on the back, and the goats can step up without a jump. Add a short ramp if you have seniors or expectant does.
Goat Farming 101: Building the Frame and Platform
Let’s get into the fun part — building your stand.
Step 1: Build the Frame
Start by cutting two 2x4s to 48 inches and two to 20 inches. Screw them into a rectangle — that’s your frame. This forms the solid base for your goat milking stand.
Step 2: Create the Platform
Lay 2x6s (or a plywood sheet) across the top. Secure with screws and sand it smooth. This is where your goat will stand, so make sure there are no gaps that could trap hooves.
Step 3: Add the Legs
Cut four legs to 16–18 inches each and attach them to the inside corners of the frame. Check with a level — an uneven stand means spilled milk later. Add a brace between each set of legs for extra stability.
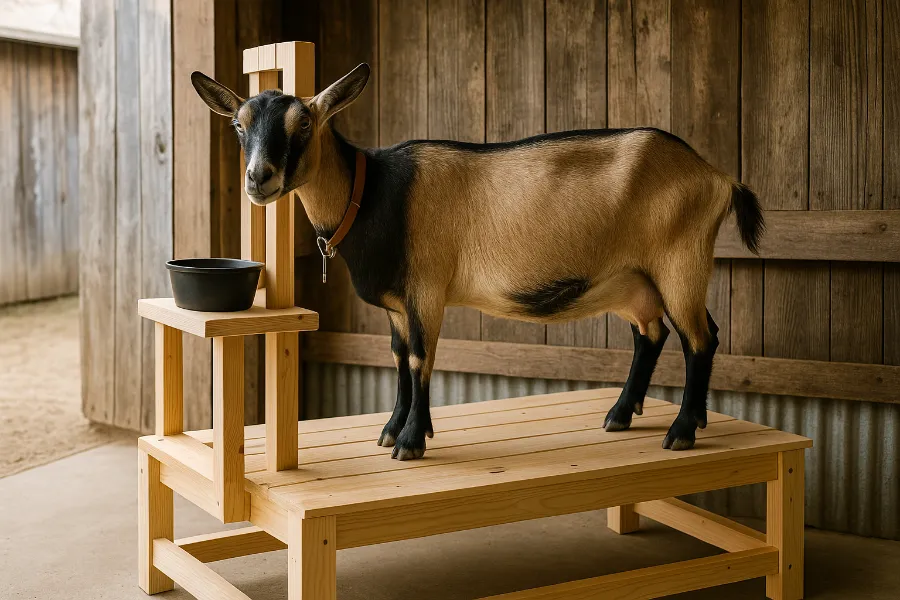
Step 4: Build the Headgate
Attach two 4×4 posts vertically at the front corners. Then add two vertical 1×4 slats — one fixed, one swinging. Drill a hole through the movable one and attach it with a carriage bolt to create a hinge. Add your latch at the top.
This allows you to gently secure your goat’s head while she enjoys her grain — safe, snug, and stress-free.
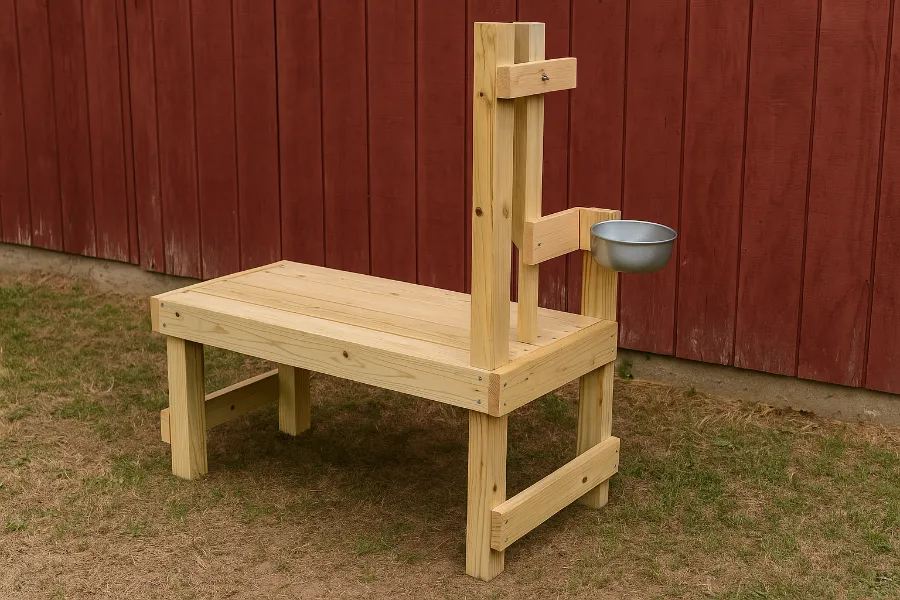
Step 5: Add the Feed Tray
Mount a feed bowl or small bucket at head height. This keeps your goat distracted with something delicious while you milk. I’ve found this little detail turns nervous goats into patient ones in no time.
Goat Care: Do’s and Don’ts When Building Your Milking Stand
I’ve built several stands over the years, and trust me — the small details matter.
Do:
✅ Measure your goats before cutting lumber
✅ Use strong, dry wood (pine or oak work great)
✅ Seal all surfaces to prevent rot and odor
✅ Check stability before your first use
✅ Clean after each milking session
Don’t:
❌ Make it too tall — goats need to feel secure stepping up
❌ Forget the latch — one head toss and your milk is gone
❌ Leave splinters or sharp edges — goats love to rub against things
❌ Skip training — goats need consistency and patience
❌ Use untreated wood if the stand lives outside
A well-built stand is as much about comfort as it is about control. Goats respond to calm, predictable handling — and your setup plays a big part in that.
Milking Equipment: Small Details That Make a Big Difference
You can have the perfect stand, but if your milking equipment isn’t right, you’ll still struggle. Here’s my go-to setup for smooth goat milking sessions:
- Stainless steel bucket: Easy to sanitize, keeps milk fresh
- Udder wipes: Warm, damp cloths prevent infection and improve letdown
- Strainer and filters: Keeps debris out of your milk
- Non-slip mat: Helps goats feel secure on the stand
- Feed scoop: Always measure grain to avoid overfeeding
When your space is organized, milking becomes effortless. I hang everything on small hooks beside the stand — towels, filters, brushes. Everything within reach, everything clean.
The Advantages of Building Your Own Goat Milking Stand
There’s real pride in creating something functional with your own hands. Beyond the satisfaction, there are plenty of practical benefits:
- Customization: You can size it for your breed and your comfort.
- Cost savings: Most DIY stands cost under $75, while store-bought ones can hit $400.
- Durability: Homemade wooden stands outlast lightweight metal or plastic versions.
- Multi-purpose use: Perfect for trimming hooves, grooming, or vet care.
- Skill-building: Once you’ve built one, you can adapt the design for other livestock.
It’s one of those small homestead projects that gives back every single day.
The Disadvantages (and How to Fix Them)
Let’s be honest — not every DIY is perfect. A few drawbacks are worth noting:
- Heavy: Wood stands can be hard to move. Add wheels or handles.
- Maintenance: Check screws monthly and reseal annually.
- Time: Expect to spend half a day on construction.
- Space: They take up a few feet of barn real estate.
But these are small prices to pay for years of reliable use. My first stand lasted nearly a decade — a little sanding, a coat of paint, and it looked good as new.
Dairy Goats and Training: Making the Stand Routine
Introducing your goats to the stand should be calm and positive. Start before you need to milk. Let them explore it, jump up, and eat grain.
Over a few days, they’ll associate it with treats — not confinement. Once they’re comfortable, gently close the headgate for a minute or two while they snack. Never rush or scold.
By kidding season, your dairy goats will climb up on cue, waiting for their breakfast. Milking becomes a quiet, meditative routine instead of a circus act.
Goat Farming and Daily Efficiency
If you’re raising goats for milk, time and consistency matter. A reliable milking stand helps keep your routine predictable — which in turn boosts milk yield.
When I first started goat farming, I underestimated how much smoother everything becomes when the animals feel secure. A calm goat means a cleaner milk line, less kicking, and better udder health.
In small herds, efficiency and animal comfort go hand in hand. And that’s where your milking stand earns its keep.
Goat Milking Hygiene and Maintenance
The moment your goat steps down, the cleanup begins. That’s just part of goat care.
I wipe down the platform after each use with diluted vinegar, then rinse and dry it. Once a week, I deep clean — scrub, rinse, reseal if needed.
If your stand lives outside, store it under cover. Sunlight and rain will wear it down fast. Once a year, tighten all screws and check for splinters or cracks.
A well-cared-for stand can last nearly as long as your favorite doe.
The Joy of Goat Equipment That Works
The best goat equipment doesn’t just do its job — it makes chores enjoyable.
When your stand is solid, your milking space clean, and your goats comfortable, those early mornings become something you look forward to.
It’s where you start the day — the sound of milk hitting the pail, the smell of sweet feed, the steady breathing of a contented animal. It’s grounding. It’s homesteading at its best.
Final Thoughts on Building a Goat Milking Stand
If you’re serious about goat farming, building your own goat milking stand isn’t just a convenience — it’s a commitment to better routines, healthier goats, and more enjoyable mornings.
It’s one of those humble projects that makes every part of homestead life run smoother. Once you’ve built it, you’ll wonder how you ever managed without it.
So grab your lumber, pour a cup of coffee, and get started. A few hours of work today will give you years of comfort, calm, and fresh milk tomorrow.
FAQs
A goat milking stand keeps your goat secure and comfortable during milking, grooming, or hoof trimming. It raises the goat to a convenient height, making chores easier and cleaner.
Most stands are 16–18 inches tall, which allows easy access for milking without straining your back. Adjust the height based on your goat’s size and your comfort.
Use sturdy, treated wood like pine or oak for durability. Seal the surface to protect against moisture and make cleaning easier.
Yes! It’s perfect for hoof trimming, health checks, grooming, or training your goats. Many homesteaders use it as a multipurpose goat care station.
Start by letting your goat explore the stand and eat grain from the feeder. Gradually close the headgate for short sessions until she’s comfortable standing still.
Most DIY stands cost between $50 and $100 in materials. Building it yourself saves hundreds compared to commercial models.
Wipe it down after each milking with vinegar or mild soap. Deep clean weekly and reseal the wood annually to prevent odor, rust, or rot.