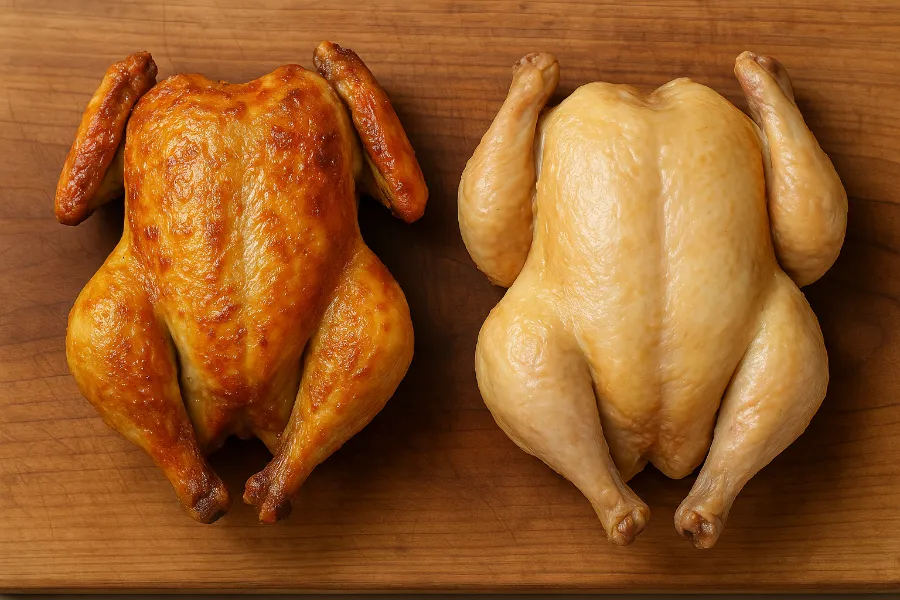
If you’ve ever pulled a perfectly golden chicken from the oven only to find the skin disappointingly soft, you’ve probably asked yourself: why is my chicken skin not crispy after brining?
I’ve been there. I spent weeks testing everything—wet brines, dry brines, oven roasts, and air fryer chicken—trying to figure out why the skin sometimes came out beautifully crisp and other times just… limp.
The truth is, brining makes chicken incredibly juicy, but it also loads the skin with extra moisture. And moisture is the number one enemy of crispness. Once you understand how to manage that moisture—and how to use air, fat, and heat to your advantage—you’ll get that satisfying crackle every single time.
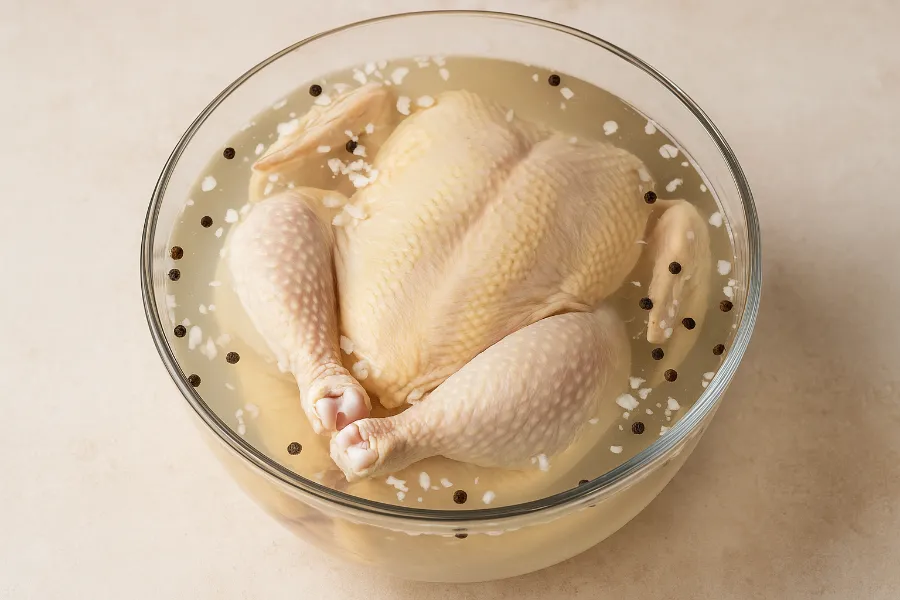
The Brining Paradox: Juicy Inside, Soggy Outside
Brining works by soaking the chicken in a salty solution that helps the meat retain moisture. That’s great for tenderness—but not for texture.
When you take a brined chicken out of the liquid, its skin is wet and swollen. If that moisture isn’t fully removed, it turns to steam in the oven. Steam softens the skin, making it rubbery instead of crisp.
The goal after brining is simple: keep the juiciness inside, but get the outside bone-dry.
Air Circulation: The Secret to Dry Skin
Here’s where most people slip up—they dry the chicken with paper towels, then immediately season and roast. That’s not enough.
After brining, pat your chicken completely dry, then place it on a wire rack over a sheet pan. Let it sit uncovered in the refrigerator for several hours or overnight.
This allows air circulation around the chicken, which gently pulls moisture off the skin. You’ll notice the skin turning slightly translucent and tacky—that’s the perfect texture for roasting.
If you skip this step, you’re essentially putting a damp chicken into a humid oven. No amount of high heat will save it from steaming.
Dry Brine Chicken: A Cleaner, Crispier Alternative
If wet brining feels like too much work—or if you’re tired of soggy results—try a dry brine chicken instead. It’s easier and often produces better texture.
All you do is:
- Rub the chicken evenly with kosher salt (and optional herbs).
- Set it on a rack, uncovered, in the fridge for 12–24 hours.
No water bath, no mess, and best of all—no extra surface moisture. The salt naturally pulls out some liquid, then reabsorbs it back into the meat, leaving the skin dry and ready to crisp beautifully.
This simple change alone made my roasted chickens consistently better.
Fat Rendering: The Hidden Key to Crispy Skin
Even perfectly dried skin won’t crisp if the fat underneath doesn’t melt properly.
Beneath every piece of chicken skin lies a thin layer of fat. That fat needs to render—meaning, it must melt and release—during cooking. If the heat is too low, it never melts; too high, and the surface browns before the fat escapes, leaving the skin greasy instead of crisp.
Here’s my go-to method for perfect fat rendering:
- Start roasting at 375°F (190°C) for 25–30 minutes.
- Then raise the heat to 425°F (220°C) for another 10–15 minutes.
That gradual rise gives the fat time to melt out before the skin crisps. You’ll see golden blisters forming and hear that gentle crackle—music to any cook’s ears.
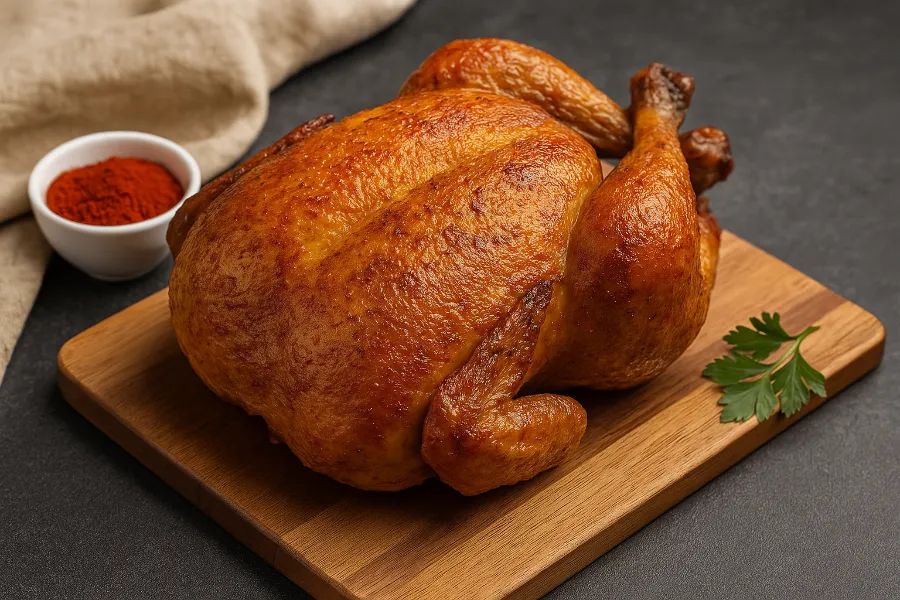
The Maillard Reaction: What Makes Skin Brown and Crunchy
When your chicken skin turns deep golden and smells amazing, that’s the Maillard reaction at work.
It’s the chemical process that happens when proteins and sugars meet heat, creating those roasted, nutty, toasty flavors we all love. But here’s the kicker—it doesn’t work if your skin is still damp.
Water limits temperature to 212°F (100°C), far below the 300°F+ needed for browning. That’s why wet skin steams instead of crisps. Once you dry it, though, the heat climbs high enough to trigger the Maillard reaction, transforming pale skin into golden, crunchy perfection.
Crispy Roasted Chicken: My Foolproof Method
Here’s the routine I use for perfect crispy roasted chicken, whether it’s a whole bird or just thighs:
- Dry it completely. After brining, pat the chicken down like you mean it.
- Air-dry overnight. Fridge time = dry skin.
- Skip oil at first. Go with salt or a light dry rub seasoning—oil can trap steam early on.
- Roast in stages. 375°F first, 425°F to finish.
- Rest uncovered. Never tent with foil; steam is the enemy of crunch.
Once it comes out of the oven, you’ll see that golden sheen, tiny bubbles on the surface (that’s skin blistering), and hear the faint crackle that says: yes, it worked.
Air Fryer Chicken: The Crispiest Shortcut
If you own an air fryer, you already have a secret weapon for crispy skin. Air fryer chicken works because of constant air circulation—it’s like a turbocharged convection oven that removes moisture fast.
To get perfect results:
- Preheat to 400°F (200°C).
- Pat your chicken really dry.
- Use a light coating of oil or spray.
- Don’t overcrowd the basket.
That constant stream of hot air dehydrates the skin quickly, while the fat underneath renders perfectly. It’s nearly impossible to end up with soggy results if you follow those steps.
And the best part? It’s faster and cleaner than oven roasting, especially for wings or thighs.
Baked Chicken vs. Air Fryer Chicken: The Moisture Difference
Baked chicken in a regular oven can still be crispy, but it needs more setup.
Traditional ovens trap a bit of steam, especially when you crowd the pan or skip the rack.
Air fryer chicken, on the other hand, thrives on open space and moving air. That’s why it often browns faster and more evenly.
If you’re using a standard oven, mimic an air fryer by:
- Using convection mode, if available.
- Elevating the chicken on a rack.
- Leaving space between pieces for proper airflow.
Moisture control and airflow are what separate chewy skin from perfect crispness.
Skin Blistering: The Sign You Nailed It
Those tiny bubbles or raised spots on chicken skin aren’t a mistake they’re a reward. Skin blistering happens when rendered fat and escaping steam puff up the surface just enough to create that thin, shattering layer.
It’s a visual cue that everything worked: the skin dried properly, the fat melted, and the heat was just right.
If your chicken has a slightly bubbled, golden surface, congratulations—you’ve officially mastered crispy skin.
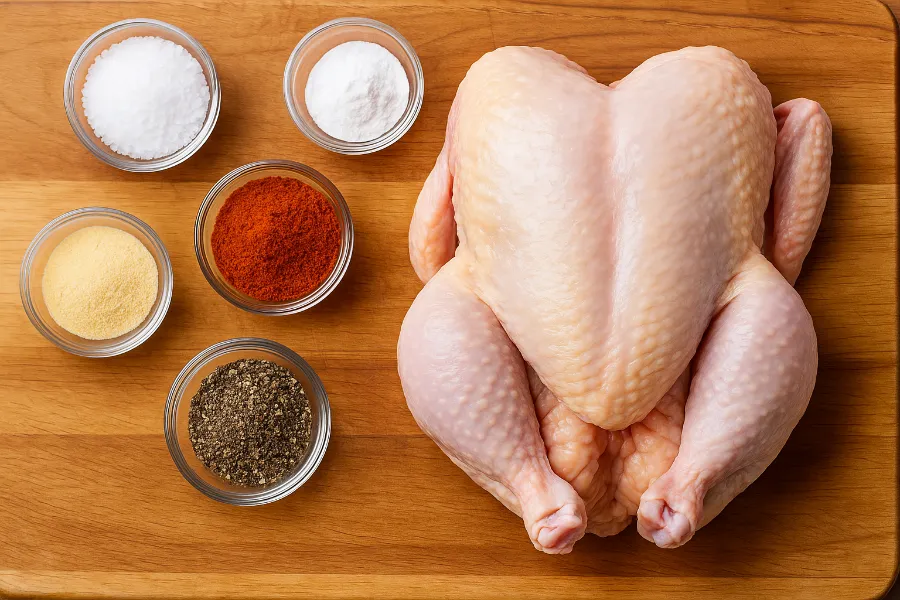
Dry Rub Seasoning: Add Flavor and Boost Crisp
A dry rub seasoning can make or break your final texture. Beyond flavor, a good dry rub actually helps draw moisture out of the skin before cooking.
My go-to mix for crisp, flavorful skin:
- 1 tablespoon kosher salt
- 1 teaspoon baking powder
- 1 teaspoon paprika
- ½ teaspoon garlic powder
- ½ teaspoon black pepper
The baking powder is key it raises the pH of the skin, which speeds up browning and dryness. Combine that with salt and air-drying, and you’ve got foolproof crisping power.
What Ruins Crispy Chicken Skin
If you’re still ending up with limp skin, one of these might be the culprit:
| Mistake | Result | Fix |
|---|---|---|
| Chicken still damp after brining | Steamed skin | Pat and air-dry thoroughly |
| Overcrowded oven or fryer | Trapped moisture | Leave space for airflow |
| Oven temperature too low | Fat doesn’t render | Start at 375°F, finish at 425°F |
| Added sugar or sauce too early | Sticky skin | Glaze at the end |
| Covered after cooking | Soft skin | Rest uncovered |
Crispy skin depends on dryness, airflow, and patience. If one of those fails, so will the crunch.
The Baking Powder Trick (When All Else Fails)
If you’re still struggling, here’s the method that never lets me down:
After drying the chicken, mix:
- 1 tablespoon baking powder
- 1 tablespoon kosher salt
Rub it all over the skin, then refrigerate uncovered overnight.
When baked or air fried the next day, the skin crisps up dramatically—light, blistered, and perfectly golden. It’s a foolproof backup plan when humidity or oven quirks try to ruin your results.
The Balance Between Juicy and Crunchy
The secret to truly great chicken isn’t choosing between juicy or crispy—it’s knowing how to get both.
Brining ensures the inside stays moist. Air-drying and proper heat ensure the outside gets crunchy. It’s all about controlling water, air, and fat so each part does its job.
Once you grasp that balance, you’ll never have to ask again why your chicken skin isn’t crispy after brining—you’ll already know the answer.
FAQs
Because brining adds moisture, the skin stays wet. To fix this, air-dry the chicken in the fridge before cooking to remove surface moisture.
Pat the chicken completely dry, then air-dry it uncovered in the fridge. Roast or air fry at high heat to let the fat render and the skin crisp.
Yes. Baking powder raises the skin’s pH, which speeds up browning and dries the surface for ultra-crispy texture.
Proper air circulation removes steam and moisture, allowing the skin to dry evenly and crisp. Use a rack or air fryer to maximize airflow.
Absolutely. The air fryer’s constant hot airflow dries the skin quickly, giving you evenly browned, crispy chicken in less time.
Start cooking around 375°F (190°C) to render the fat, then finish at 425°F (220°C) for blistered, crunchy skin.
No. Covering traps steam and softens the skin. Always rest your chicken uncovered to preserve the crisp texture.