Every fall, I look forward to the scent of roasting pumpkins filling the kitchen — that gentle caramelized sweetness that makes you want to bake everything in sight. And every year, someone asks the same question: “Can you really learn how to make pumpkin puree without a food processor?”
Absolutely. In fact, that’s the way I’ve been doing it for years. Long before electric gadgets took over, cooks used their hands, a few trusty tools, and a bit of patience to make perfectly smooth, rich pumpkin puree. Today, I’ll show you the full process — step-by-step, using only simple, manual tools that give your puree more flavor, more texture, and more heart.
Pie Pumpkins: The Secret to Perfect Homemade Puree
Before you even think about mashing or straining, start with the right pumpkin. The giant carving pumpkins you see every October are wonderful for decorating, but their flesh is watery and bland. For baking, soup, or dessert, the magic words are pie pumpkins — also called sugar pumpkins.
They’re smaller, about 2–4 pounds each, with thick, sweet flesh and very little moisture. You can usually find them in the produce section from late September through November. When choosing one, look for:
- A smooth, firm exterior with no soft spots
- A deep orange color
- A weight that feels heavier than it looks (that means dense flesh)
I like to keep a few extras on hand because homemade puree freezes beautifully (we’ll talk about that later).
Roasting or Steaming: The First Step in How to Make Pumpkin Puree Without a Food Processor
Once you’ve chosen your pie pumpkins, wash them, slice them in half from top to bottom, and scoop out the seeds. You can roast or steam — both work great depending on what you plan to use the puree for.
Roasting method (best flavor):
- Preheat the oven to 375 °F (190 °C).
- Place the pumpkin halves cut-side down on a parchment-lined pan.
- Roast for 40–60 minutes, until a fork slides easily through the skin.
- Let cool, then scoop out the flesh.
Roasting adds a gentle caramel note that makes the puree richer — perfect for pies, breads, and desserts.
Steaming method (smoothest texture):
- Cut pumpkin into 3-inch chunks.
- Steam over simmering water for 20–30 minutes, until tender.
- Drain well to avoid watery puree.
If you’re making baby food or soup, steaming gives a lighter texture that’s easy to blend by hand.
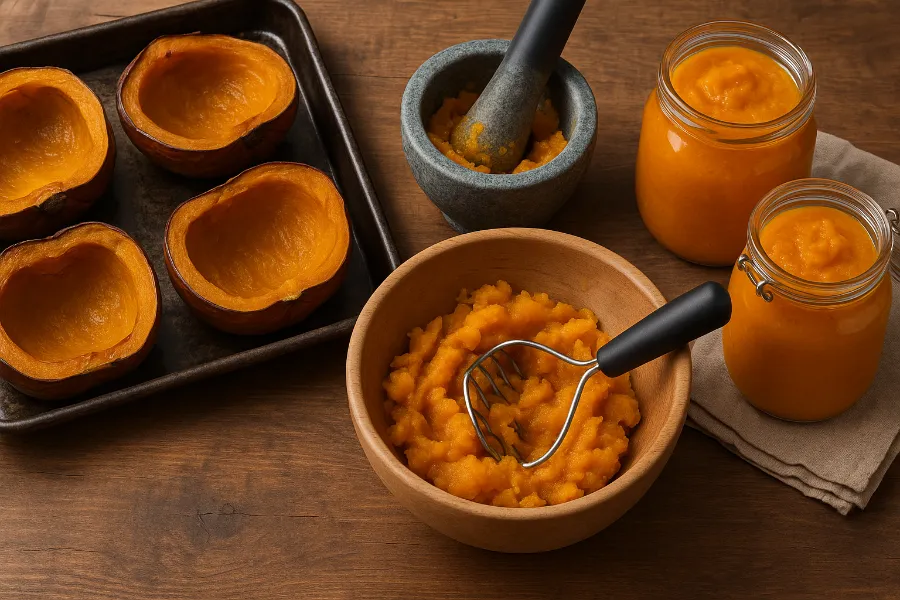
Potato Masher: The Homesteader’s Favorite Tool
Once your pumpkin is soft, it’s time to transform it into puree. My first go-to tool is the humble potato masher. It’s simple, sturdy, and perfect for warm, roasted pumpkin.
How to do it:
- Scoop the warm flesh into a wide bowl.
- Press down firmly with the masher, working in circles.
- Keep going until you reach your desired texture — slightly chunky for rustic bakes, smoother for custards or pies.
If you warm the pumpkin just a little before mashing, it practically melts under the masher. It’s surprisingly satisfying — no electric noise, no rush, just pure kitchen rhythm.
Mortar and Pestle: Old-World Smoothness
If you really want to channel traditional cooking, grab a mortar and pestle. It’s slower but gives a silkier, more refined texture than mashing alone.
How I use mine:
I scoop a small amount of roasted pumpkin into the mortar, then grind it in slow, circular motions with the pestle. The natural stone surface gently breaks down fibers without releasing excess water (a common problem when using food processors).
Add a splash of warm water, milk, or cream if you want to loosen the texture. The result? Deeply flavored, smooth puree that still feels homemade — perfect for recipes where texture matters.
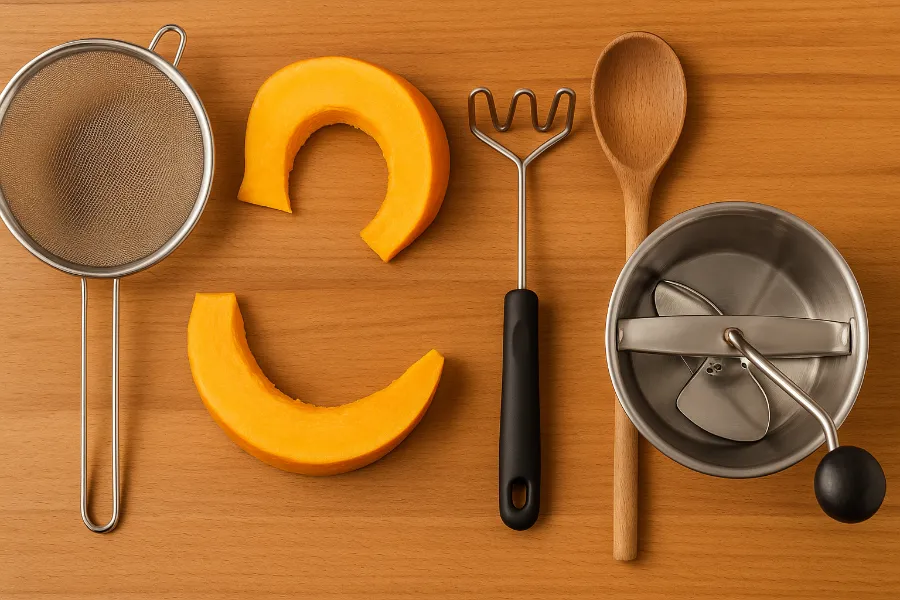
Fine Mesh Sieve: For Bakery-Level Silkiness
Once you’ve mashed or pounded your pumpkin, you can refine it even more by pressing it through a fine mesh sieve. This step makes your puree so smooth it’s worthy of a patisserie kitchen.
Here’s how:
- Set a fine mesh sieve over a large bowl.
- Spoon the mashed pumpkin inside.
- Use a spatula or spoon to press and swirl it through.
- Scrape the underside of the sieve occasionally — that’s your golden puree right there.
Yes, it takes a few extra minutes. But if you’ve ever tasted pie made from this kind of hand-sieved pumpkin, you’ll understand why bakers swear by it. The flavor stays pure, the color is brighter, and there’s zero graininess.
Food Mill: The Hand-Crank Workhorse
If you have one, the food mill is a treasure for anyone who loves traditional cooking. It’s like a manual food processor — no electricity, just a crank and blade that gently presses the pumpkin through small holes, separating fibers and skins in the process.
Using it is simple:
- Place roasted pumpkin pieces in the mill.
- Turn the handle steadily.
- Collect the puree underneath and discard the leftover skins and strings.
This method is perfect when you’re making large batches for holiday baking or want consistent results with minimal effort.
I often use the food mill when I’m prepping multiple pie pumpkins at once for my Thanksgiving freezer stash.
Freezing Pumpkin Puree: Storing Autumn Flavor All Year
Once you’ve learned how to make pumpkin puree without a food processor, you’ll never go back to store-bought — which means you’ll want to keep some on hand for later. Luckily, freezing pumpkin puree is incredibly easy.
Steps:
- Let your puree cool completely.
- Portion it into freezer bags or containers (1 cup each works perfectly — most pumpkin recipes call for that amount).
- Label and date them.
- Freeze flat to save space.
Storage times:
- Refrigerator: up to 5 days
- Freezer: up to 3 months
When you’re ready to use it, thaw overnight in the fridge and stir to smooth it out again. You can even portion the puree in ice-cube trays for baby food or small recipes.
Pumpkin Recipes: What to Make with Your Homemade Puree
Once you’ve made your own pumpkin puree, you’ll start noticing how it transforms everything you cook. It’s thicker, sweeter, and more vibrant than canned pumpkin — a little goes a long way.
Here are a few pumpkin recipes where homemade puree truly shines:
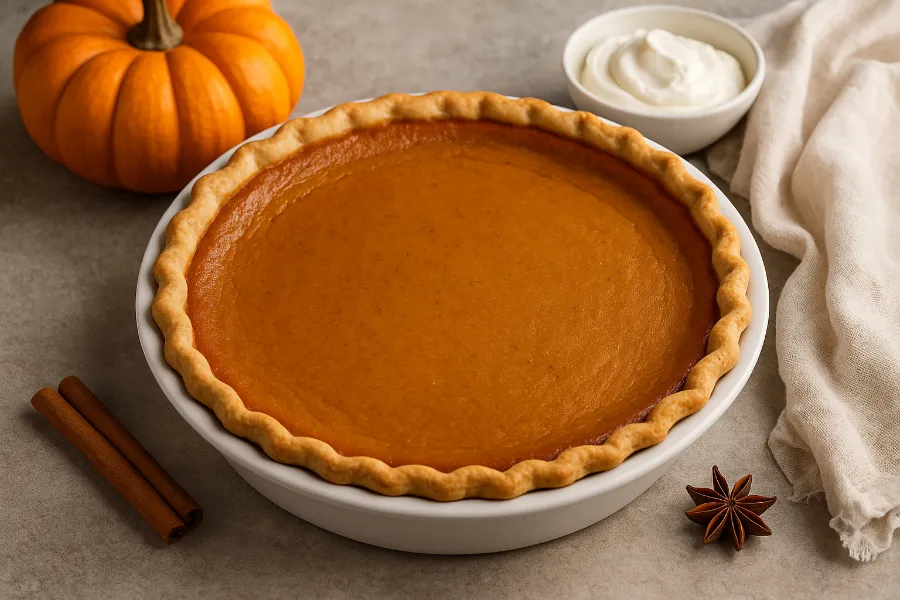
1. Classic Pumpkin Pie
The ultimate autumn dessert. Blend puree with eggs, sugar, cream, and spices, and bake until the center barely jiggles. Homemade puree gives it that unmistakable farm-fresh flavor.
2. Pumpkin Bread or Muffins
Add your puree to quick-bread batter for soft, golden loaves. A dash of molasses or maple syrup enhances the earthy sweetness.
3. Pumpkin Soup
Sauté onions, add pumpkin puree and broth, then finish with cream and nutmeg. The velvety texture comes alive when the puree is made by hand.
4. Pumpkin Pancakes
Whisk puree into pancake batter for a cozy breakfast that tastes like fall mornings by the fire.
5. Pumpkin Butter
Simmer your puree with brown sugar, cinnamon, and cloves until thick and spreadable — incredible on toast or biscuits.
Best Practices for Making Pumpkin Puree by Hand
Over the years, I’ve learned a few small tricks that make a big difference:
- Mash while warm.
Warm pumpkin breaks down more easily; once it cools, the fibers tighten. - Don’t add water too soon.
Wait until the texture tells you it needs moisture — a tablespoon or two is usually plenty. - Keep it plain until you use it.
Avoid adding spices or sugar before freezing; that keeps it versatile for sweet or savory dishes. - Taste before baking.
Every pumpkin is slightly different — some sweeter, some earthier. Adjust your recipe accordingly. - Strain watery puree.
If you notice excess liquid, let the puree sit in a sieve lined with cheesecloth for 30 minutes before storing.
These steps guarantee your pumpkin puree is flavorful, smooth, and consistent every time.
Troubleshooting Common Pumpkin Puree Problems
| Issue | Cause | Fix |
|---|---|---|
| Watery puree | Over-steamed pumpkin | Strain through a fine mesh sieve |
| Stringy texture | Undercooked pumpkin | Roast or steam longer |
| Grainy texture | Pumpkin cooled before mashing | Reheat gently and mash again |
| Bland taste | Used carving pumpkin | Stick to pie pumpkins |
| Too thick | Over-reduced puree | Add small splash of milk or water |
Why I Still Prefer Manual Tools
Sure, a food processor can do this job in seconds. But the truth is, when I use my hands whether it’s with a potato masher, mortar and pestle, or food mill the process feels alive. The texture is better. The flavor is more intense.
Hand-mashing also avoids the over-aeration that happens with electric blades, which can make puree watery and dull. Plus, there’s something grounding about the rhythm of mashing, pressing, and tasting it’s slow food in its truest sense.
If you’ve ever grown your own pie pumpkins or bought one from a local farm, making your puree by hand is the perfect way to honor that harvest.
How to Store and Use Your Pumpkin Puree Throughout the Year
When I’m preparing for the holidays, I like to make a large batch of puree and freeze pumpkin puree in one-cup bags. That way, when I’m ready to bake pumpkin pie or whip up a batch of muffins, all I need to do is thaw one bag overnight.
You can even keep a few jars in the fridge for quick cooking:
- Add a spoonful to your morning oatmeal.
- Stir into chili or stew for natural sweetness.
- Blend with coconut milk and curry for a quick Thai-inspired soup.
Homemade puree is far more versatile than most people realize — it’s not just for pie!
Why Homemade Pumpkin Puree Beats Canned Every Time
The biggest surprise for first-timers is how different homemade puree tastes compared to canned. Canned pumpkin is often made from various winter squashes blended together, not true pumpkin.
Homemade puree, especially from pie pumpkins, has a naturally sweet, almost nutty flavor. The color is deeper, the aroma stronger, and the mouthfeel creamier.
And when you make it by hand — no food processor, no shortcuts — it just feels right. You can taste the effort, the care, and the slowness that defines good homestead cooking.
Final Thoughts: Bringing Back the Hands-On Kitchen
Learning how to make pumpkin puree without a food processor isn’t about rejecting modern convenience; it’s about rediscovering the pleasure of doing things the long way — the better way.
Each mash, each press through the sieve, connects you to generations before us who cooked by feel, taste, and intuition. When I spoon that fresh puree into a pie crust or a soup pot, I know I’ve captured more than flavor — I’ve captured the season itself.
So this fall, skip the can and skip the blades. Grab your potato masher, your mortar and pestle, or even your food mill, and let the simple rhythm of old-fashioned cooking remind you that some things are worth doing by hand.
FAQs
Yes! You can easily make smooth pumpkin puree by hand using tools like a potato masher, mortar and pestle, fine mesh sieve, or food mill.
Use pie pumpkins (also called sugar pumpkins). They’re smaller, sweeter, and denser than carving pumpkins, giving your puree better flavor and texture.
Mash it while warm using a potato masher, then press it through a fine mesh sieve for an extra silky texture similar to canned puree.
Absolutely. Freezing pumpkin puree in 1-cup portions keeps it fresh for up to 3 months. Thaw in the fridge and stir before using.
Roasting gives a deeper, sweeter flavor, while steaming keeps the puree lighter and smoother—perfect for soups or baby food.
Simply strain it through a cheesecloth or fine sieve for about 30 minutes to remove excess moisture.
Yes, just measure it cup-for-cup. Homemade puree has a fresher, richer flavor, so it often enhances baked goods and soups.