When I think about goat care, one of the moments I always find myself planning for is kidding season. The nights when a doe gives birth can be both magical and nerve-wracking, but over the years I’ve learned that a lot of that stress comes down to how well you prepare a goat kidding stall. Get that stall right—and I mean the shelter, bedding, temperature, cleanliness, monitoring—you dramatically increase your chances for safe births, healthy kids, and low drama.
Below is my updated guide: from old-school DIY setups I’ve used over the years to modern, sensor-driven, smart-farming upgrades. Every header below is one of your SEO keywords, because yes—I want this post to be found by folks searching for goat shelter, barn design, heat lamp, goat app, and all the rest. Let’s dive in.
Goat Shelter
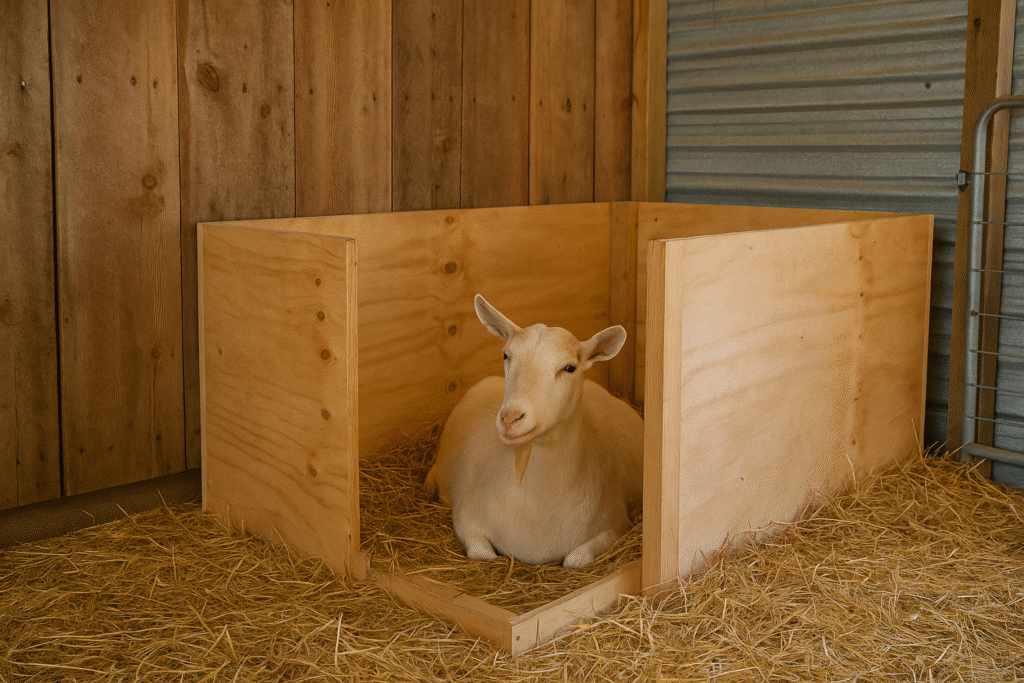
When building or choosing a goat shelter for your kidding stall, I always go back to first principles—safety, warmth, and privacy. Early on I used an extra corner of the barn, patched with plywood or pallet boards, and that worked fine. But over time I’ve refined the process.
Traditional Shelter Tips
- Use solid walls about 3 to 4 ft high to block drafts but still allow light and airflow.
- Position the stall facing east if possible, so it catches morning sun (it helps dry dew and give natural warmth).
- Keep the floor slightly raised or sloped for drainage; avoid low spots where water can collect.
- Use overhangs or partial roofing so rain cannot blow in.
Modern Shelter Upgrades
- Insulated panels or composite boards reduce thermal swings.
- Modular panels that you can rearrange—so your kidding stall can expand or contract as needed.
- Transparent roof panels or polycarbonate sheeting to bring in diffused daylight without creating glare.
- Built-in vents with adjustable flaps for airflow control (especially important when humidity is high).
A well-designed goat shelter sets the tone for the entire kidding experience: dry, quiet, and protected.
Goat Farming
In goat farming, kidding season is where your labor, planning, and instincts converge. Over years of managing dairy goats, meat goats, and mixed herds, I’ve come to see that successful goat farming isn’t about fancy tools—it’s about consistency, observation, and having the right environment ready when nature does its thing.
I treat the kidding stall as one of my most critical “tools” on the farm. Just like I plan forage rotation or parasite control, I plan goat kidding logistics. In a busy kidding season, multiple does might go at once; knowing your stall capacity, backup stalls, and cleanup routine can make or break your season.
When I compare my setup now to early years, I see patterns: always have an overflow stall, always plan for failures, always keep spare bedding, and always test your systems (lights, sensors, gates) ahead of time.
Dairy Goats
If you keep dairy goats, kidding takes on extra weight. New kids mean colostrum, early milking, and the pressure of preserving milk supply. The kidding stall becomes your first line of defense against mastitis, stress, and failed nursing.
Here are a few pointers relevant to dairy goats:
- Use a stanchion or head restraint built into the stall so you can milk or assist without stressing her. (I learned this the hard way when one doe rejected her kid and I needed to milk her while she was still weak.)
- Ensure clean bedding so the udder doesn’t contact bacteria-laden surfaces.
- Monitor temperature closely; cold kids struggle, but overheated stalls can raise humidity and infection risk.
- In my experience, dairy goats tend to dislike total isolation. I sometimes leave them with visual contact of the main herd but behind a solid partition to reduce noise and interference.
For dairy goat keepers, the kidding stall is not just about birth—it’s about jump-starting a healthy, productive lactation period.
Goat Housing
Your goat housing beyond the kidding stall matters, because that’s where the doe lives before and after birth. But for the few days around kidding, she should be moved into a specialized space that minimizes stress and maximizes oversight.
I like to keep the kidding stall adjacent to my primary housing, but partitioned. That way she still hears the herd—but isn’t jostled or bumped. In early setups, I sometimes created ad-hoc pens using cattle panels, but now I prefer fixed housing with sliding walls so that I can isolate or open the space easily.
A key lesson: make sure your goat housing has access to plumbing, electricity, and drainage. You’ll want water, light, and a place to wash your tools close by. If you have to run extension cords or hoses, it’s a sign your layout isn’t optimized.
Barn Design
If you’re designing a barn or redesigning your barn layout with kidding in mind, this is where structural decisions really pay off. In early years I sometimes retrofitted a corner for kidding; now I plan barns with kidding wings or lanes.
Things I emphasize in barn design:
- Corridors wide enough for quick access (you don’t want to stall in a tight alley when a doe is laboring).
- Drainage slope in floors to run waste or rinse water into a gutter.
- Isolation zones for sick, recovering, or first-time does.
- Access to natural light and cross-ventilation, but with the ability to close vents in wind or storms.
- Electrical ports positioned for heat lamps, sensors, and cameras.
One of my favorite recent upgrades was adding a “maternity row” in the barn, with sliding partitions so I can convert one large pen into 3–4 kidding stalls when needed. It gives me flexibility I didn’t have before.
Natural Bedding
One of the toughest decisions every goat keeper faces is bedding choice. My philosophy: use natural bedding wherever possible. There’s a reason farmers have used straw for centuries.
Here’s how I use natural bedding:
- A thick base layer of straw (4–6 inches or more) gives insulation and softness.
- Underneath, I mix in wood shavings or sawdust in wetter climates to absorb moisture.
- In dry climates, just straw is often enough.
- I add fresh bedding daily around the kid area, and always bury placenta or soiled clumps.
Natural bedding has a few unbeatable advantages: it’s gentle, compostable, inexpensive (if you have local supply), and forgiving. Even with sensors or pads, I always revert to a layer of straw as a foundation.
Straw Bedding
Because straw bedding is such a cornerstone, let’s dig deeper into what makes good straw bedding in a kidding stall.
- Go for coarse, long-stem straw if you can—it traps more air and insulates better.
- Avoid dusty straw, especially around kidding—you don’t want respiratory issues for newborns.
- Change the top layer frequently. When straw gets wet or compressed, it becomes cold and unsanitary.
- After kidding, you can compost the used straw (if no disease was present) or burn it if needed.
My rule of thumb: the moment I can’t fluff the straw with a gloved hand, it’s time to replace it. The longer you wait, the more risk you introduce.
Goat Barn
When I refer to my goat barn, I’m thinking about the full structure that supports kidding, feeding, housing, and cleaning. The kidding stall is a feature within the barn, not separate.
Over time I’ve retrofitted my goat barn:
- Installed wash-down walls near stalls to rinse out after use.
- Installed gutters or channels in the floor leading to a manure pit.
- Added removable panels so stalls can be opened into bigger pens after kids are stronger.
- Prewired lighting and camera lines, so I don’t have to drag extension cords.
In modern barns, I also add sensor lines along rafters to monitor temperature and humidity zones. This helps me see “hot spots” or areas that need more ventilation. The goat barn becomes a living organism.
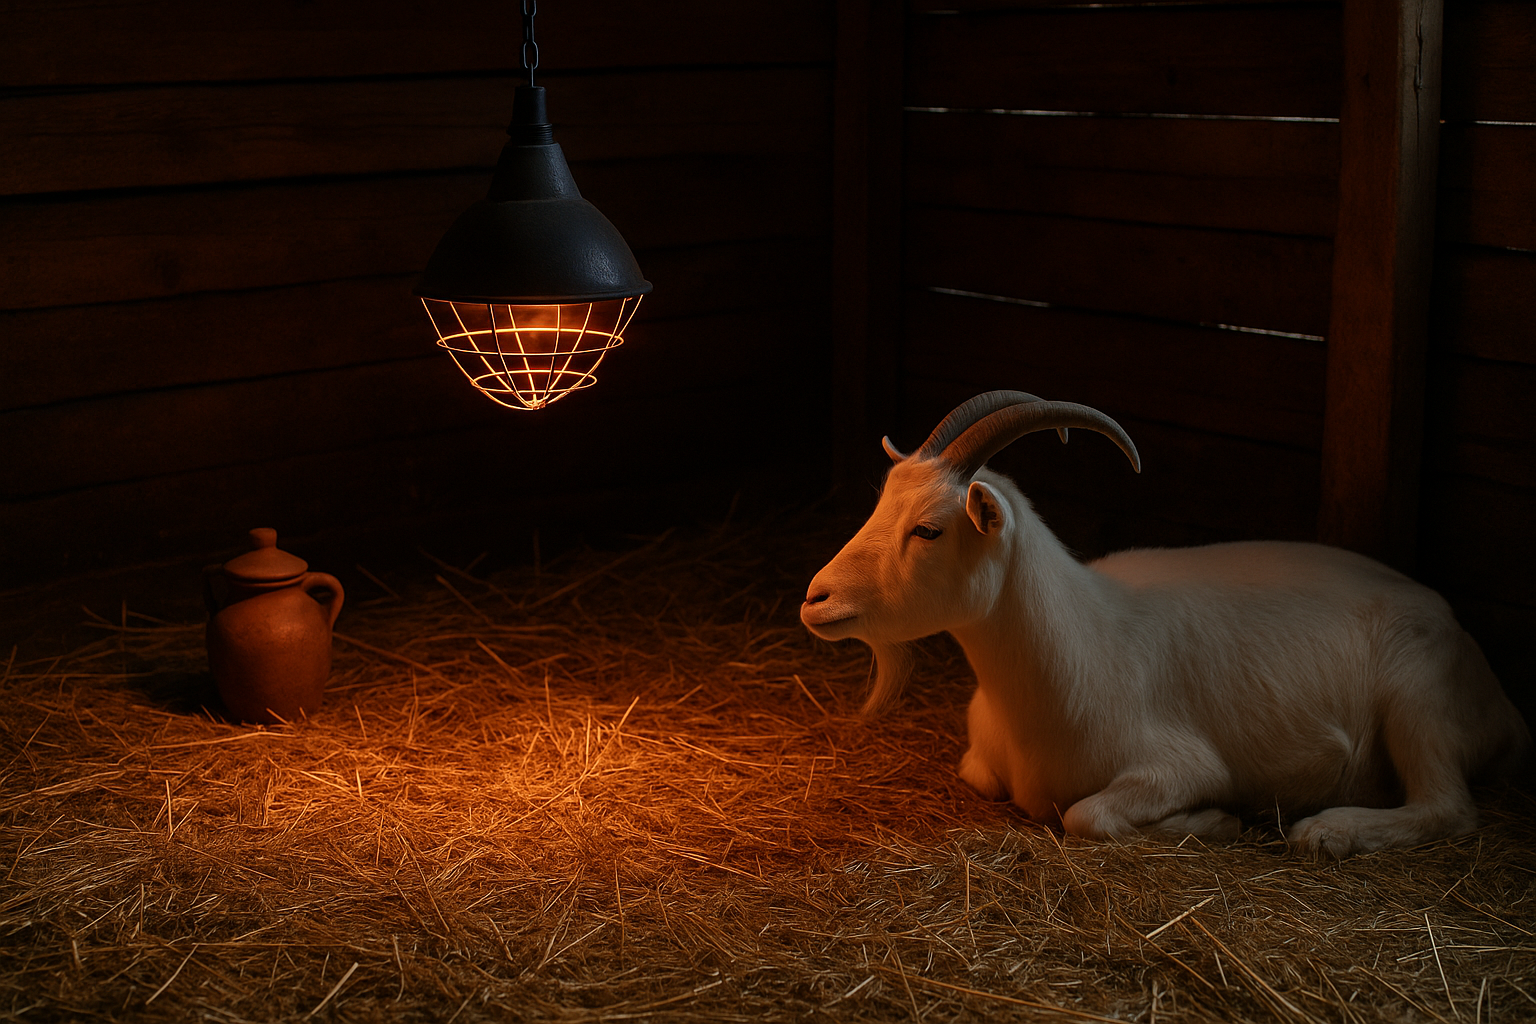
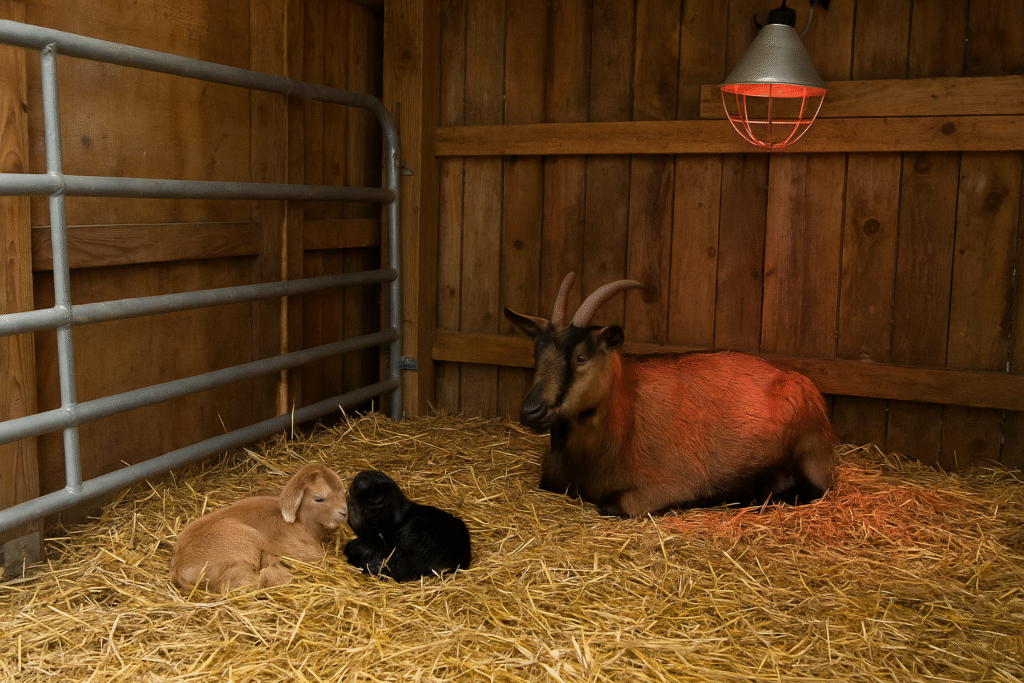
Heat Lamp
A heat lamp is one of the oldest tricks in the book—and still one of the most effective when used safely. I always have at least one lamp ready in the kidding stall.
Here are usage tips from experience:
- Mount the lamp high enough so it warms, not burns — maintain at least 18–24 inches above the bedding.
- Use metal guards around bulbs to prevent contact with straw.
- Use a thermostat or dimmer so the lamp doesn’t overheat when the doe lies down.
- Only turn on when needed (cold nights, drafty areas); turn off during daytime to avoid overheating.
In my early years I lost a lamp due to stray straw contact. After that I always enclosed them in cages and install a trip switch so if the lamp falls, it shuts off.
Heat lamps are great for emergency warmth or chilly nights, but they’re no substitute for good insulation + stable ambient temperature. They should be a supplement, not the primary heat source.
Goat App
This is where the old farm meets the new farm. A goat app (or herd management app) is now one of the first things I fire up when kidding season rolls around.
Here’s how I use it:
- Log breeding dates, projected kidding windows, and gestation progress.
- Tie sensor data (temperature, humidity, motion) into the app so I get alerts on my phone.
- Record each birth: time, kid weights, sex, any intervention.
- Flag does for extra monitoring (first-time moms, past birthing issues).
- Track cleaning schedules and maintenance logs.
When I had just 5 or 6 does, I used paper logs. Now with 30–40 does, the app saves hours every week and reduces mistakes. And yes—if it also sends me a push notification when a doe’s stall gets below 60 °F at 2 AM, I’ll never go back.
Smart Farming
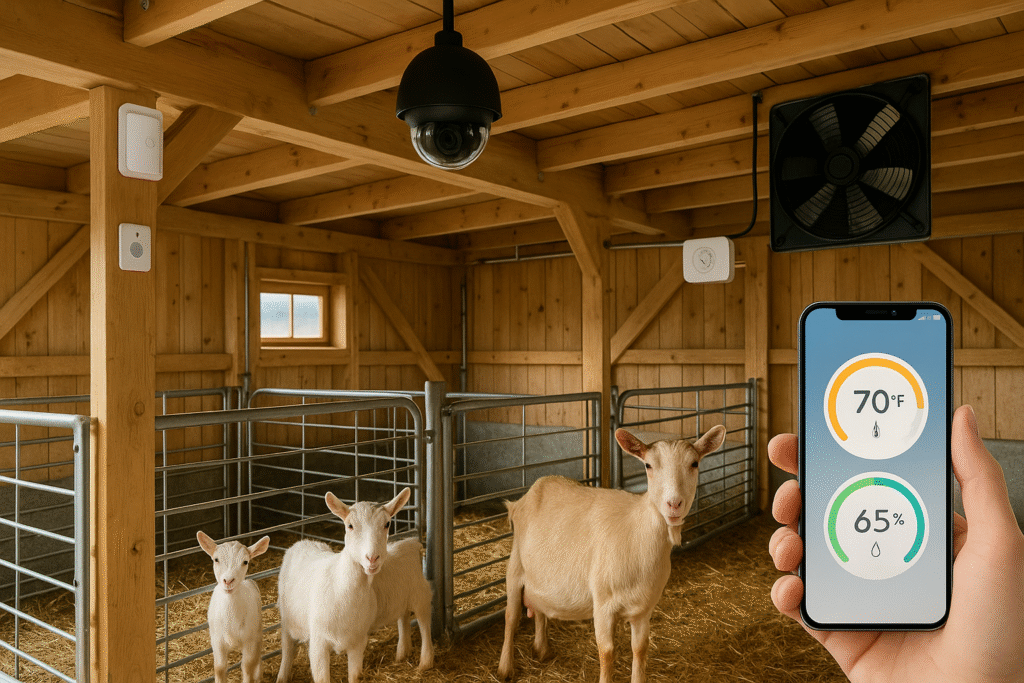
Talking about smart farming, I want you to see how all the pieces (sensors, goats, barn, app) come together:
- Temperature sensors and humidity sensors in each stall feed live data to your goat app.
- Automated fans or dampers switch on when humidity goes above threshold.
- Motion sensors detect restlessness (often early labor signs).
- Cameras with low-light vision let you watch births remotely.
- Automated climate control holds ambient temperature steadier than a heat lamp ever could.
Smart farming doesn’t mean replacing your hands—it means giving you better tools to use your hands only when truly needed. I still walk the barn every morning, but now the tech helps me see problems before they become crises.
Temperature Control
If I could pick one single factor to obsess over, it would be temperature control. It’s the silent keystone of healthy kidding.
From experience:
- Ideal stall temp: around 65–75 °F (18–24 °C). Below 60 °F, kids struggle; above 80 °F, stalls get stuffy and damp.
- Don’t rely on a single heater or lamp—distribute warmth evenly.
- Use thermostats tied to your sensors, so heaters or fans adjust automatically.
- Pre-warm the stall a day before due date; let it hold steady overnight.
- In summer, reverse the logic—cooling is as important as heating.
I once had a doe kid in near-freezing temps because the heater died; that was a lesson I won’t repeat. Now I always test thermostats and backup heaters before kidding season starts.
Humidity Control
Too many folks ignore humidity control, but I swear it’s as dangerous as temperature extremes.
Here’s what I do:
- Place humidity sensors in each stall—if it crosses 60%, fans or vents come on automatically.
- Use ventilation shafts, ridge vents, or side vents to allow continuous airflow (without drafts at kid level).
- After each birth, fully open the stall to let steam and moisture escape.
- During humid seasons, run dehumidifiers or desiccant systems near birth zones.
- Monitor bedding moisture. Even if temp is perfect, wet bedding is a breeding ground for bacteria.
I’ve seen kids struggle in what looked like “comfortable” stalls—until I checked and found humidity was at 70% and bedding was damp. That’s when pneumonia, navel infections, and weak kids show up.
Clean Bedding
One of the easiest—yet most critical—steps in preparing a kidding stall is maintaining clean bedding.
Lessons I’ve learned (sometimes the hard way):
- Always start with a thick, fresh base. Never reuse deeply soiled bedding from previous seasons unless sterilized.
- Daily remove wet spots or soiled clumps—especially under the doe or around the kids.
- Replace the top 1–2 inches at least daily during kidding season.
- After each birth, strip the whole stall, wash surfaces, disinfect, dry, and re-bed before reuse.
- Use absorbent layers or liners beneath the straw if needed (especially on slick floors).
Even when modern systems tell me everything’s fine, I still physically inspect the bedding every time I enter the stall. I want it fluffy, dry, and welcoming.
Temperature Sensor
Finally, I want to highlight the role of temperature sensors because in many ways they’re the unsung heroes of my kidding setups.
- I mount sensors at kid level—not ceiling level—so readings reflect what the newborns actually feel.
- Each stall has its own sensor, so I detect localized cold/hot spots.
- The sensors tie into the goat app and adjust heaters, fans, or dampers automatically.
- I test sensor calibration monthly to avoid drift errors.
- When I travel or sleep, the sensors are what keep me from disaster: if a stall drops below threshold, I get an alert and can respond immediately.
In early days I’d wake up randomly, wander out, check with hands. Now the sensors are like extra eyes, heat wards, and guard dogs—quiet but urgent when needed.
My Kidding Stall Ritual (Before Birth)
I always follow a ritual so I don’t miss small but critical steps:
- Test all systems (lights, heat, sensors, gates) 48 hours before due date.
- Clean and disinfect stall area.
- Add fresh straw bedding (deep enough, mixed well).
- Prewarm the stall to ~70 °F.
- Place heat lamp on standby, sensor system armed, camera focused.
- Set up towels, colostrum, iodine, kid blankets, feeding kit nearby.
- Move doe in a day or two before rough labor signs—let her settle.
This ritual gives me confidence and ensures I’m not fumbling in panic when the real moment comes.
After the Kid Arrives
After birth, the stall becomes a bonding zone:
- Dry kids vigorously, warm under lamp or heated area only if needed.
- Dip umbilical cord in iodine.
- Let mother clean and bond.
- Monitor breathing, temperature, nursing.
- Replace bedding under and around the kids immediately.
- Keep stall closed to drafts but ventilated for humidity.
- Continue sensor monitoring and manual checks for first 24 hours especially.
The first 48 hours are when most problems manifest—watch for cold stress, refusal to nurse, or damp bedding.
Blending Tradition and Tech in Goat Care
I’ve grown to believe that the best approach to preparing a goat kidding stall blends the wisdom of tradition with the precision of modern tech. Straw bedding, draft control, and calm shelter are timeless. Sensors, smart apps, and remote alerts are the new allies.
Over the years I’ve fine-tuned my systems: I don’t need every gadget, but the right ones—temperature sensors, humidity control, a goat app—make the difference between good outcomes and heartbreak.
So whether you’re building your first kidding stall or upgrading a decades-old barn, use the headers above as your checklist. If you nail goat shelter, bedding, climate, and monitoring, you’ll be well ahead of 90% of kidding problems.
FAQs
Clean and disinfect the stall a few weeks before kidding, add deep straw bedding, ensure good ventilation, and maintain stable temperature and humidity.
Keep the stall between 65–75°F (18–24°C). Use a heat lamp or thermostat-controlled heater during cold nights to maintain consistent warmth.
Straw bedding is ideal for kidding because it’s natural, warm, and easy to replace. Avoid sawdust or dusty materials that can irritate newborns.
Smart farming tools like temperature sensors, goat apps, and humidity controls let you monitor and adjust stall conditions remotely, ensuring healthier births.
Replace the top layer daily during kidding season and fully refresh it after each birth to keep the environment clean and bacteria-free.
High humidity can lead to mold, respiratory issues, and infections. Use fans or dehumidifiers to keep humidity below 60% for safer kidding conditions.
Move her in about one week before her due date or as soon as she shows early labor signs, so she can get comfortable in her private space.