I still remember the first time I baked a pumpkin pie from scratch. The filling was perfect — silky, spiced, and beautiful — but when I sliced it open, the bottom crust was soggy. My heart sank faster than the middle of an underbaked cake. That’s when I learned a hard but crucial truth about baking: the best pies start long before the filling goes in.
The secret lies in blind baking — pre-baking your crust before adding any filling. Whether you’re making a lemon tart, a quiche, or a chocolate cream pie, mastering blind baking tips for flaky pie crusts transforms every pie from decent to bakery-level perfect.
Blind baking is about understanding heat, butter, and timing. It’s part science, part instinct, and a whole lot of patience. These 10 techniques, gathered from traditional methods, modern innovations, and Michelin pastry kitchens, will help you create a pie crust that’s golden, crisp, and beautifully flaky — the kind that holds up even under rich fillings and creamy layers.
Flaky Pie Crust
A flaky pie crust starts with cold ingredients and confident, minimal handling. Every fold and chill you give your dough decides how flaky it will be in the end.
I like to think of it as choreography between fat and flour. Butter stays cold so that when it hits the heat of the oven, it bursts into steam. That steam separates the dough into tiny layers that crisp and lift — the essence of flakiness.
Here’s my non-negotiable routine for perfect flake:
- Chill everything. Your butter, flour, bowl, and even rolling pin if your kitchen runs warm.
- Cut butter into small chunks. Stop when they’re about the size of peas — too small, and you lose those all-important steam pockets.
- Add ice-cold water gradually. Just until the dough holds together when pressed.
- Rest the dough. Wrap it up and refrigerate for at least 30 minutes (an hour is even better).
When the butter finally melts during baking, you’ll see the payoff — a light, crisp, layered crust that shatters gently beneath your fork.
Blind Bake Crust
To blind bake crust means to pre-bake your pie shell without the filling, allowing it to crisp and set before any moisture from fillings can soak in. It’s a step many bakers skip, but I can promise you: it’s the difference between “pretty good” and “wow, this crust is incredible.”
Here’s how I blind bake perfectly every time:
- Roll your chilled dough into the pie dish and gently press it in — no stretching!
- Trim excess dough, leaving about half an inch overhang to account for shrinkage.
- Chill the shaped crust again for 15–20 minutes before baking.
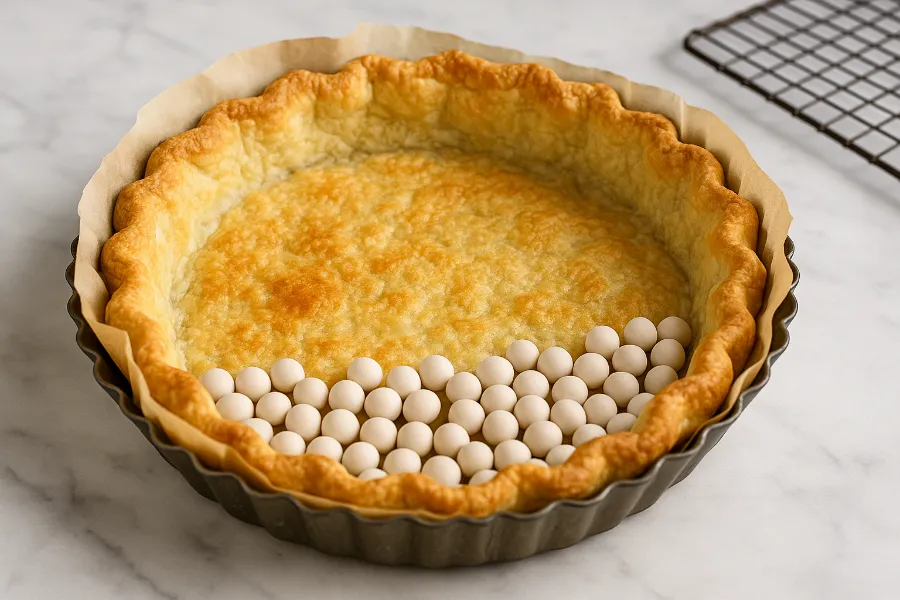
- Line it with parchment paper or foil, making sure it fits snugly against the edges.
- Fill with pie weights, dried beans, or rice.
- Bake at 350°F (175°C) until the edges start to set and turn pale gold.
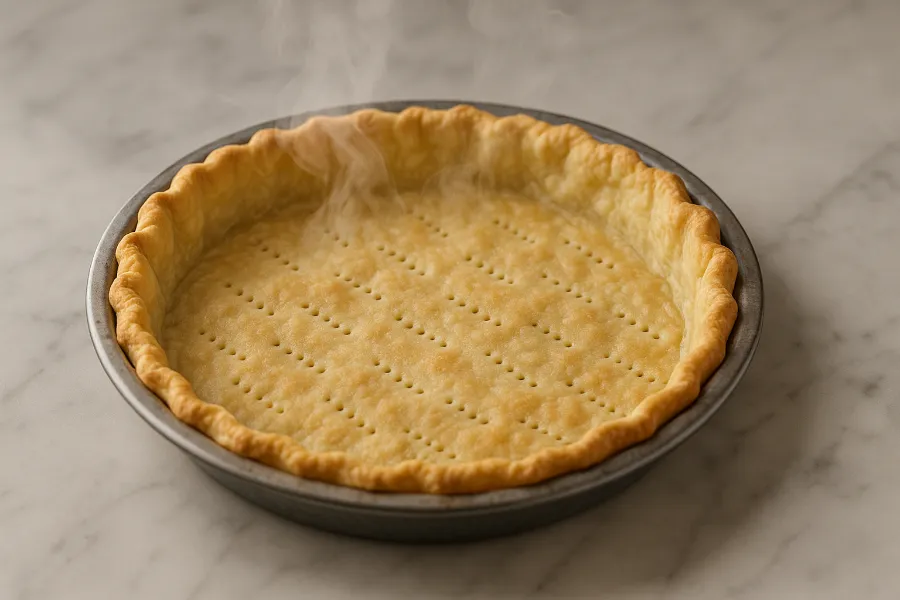
- Remove the weights, prick the bottom with a fork, and return to the oven at 400°F (200°C) for another 10–15 minutes.
The first bake sets the shape; the second adds crispness. It’s a small extra step that ensures your crust stays crisp and doesn’t sag once the filling is added.
Buttery Crust
I’ve tested every fat imaginable — shortening, lard, even coconut oil — but nothing compares to the flavor of a buttery crust. Butter is what gives crust that rich aroma and satisfying snap.
The key to handling butter correctly is respecting its temperature and texture. You want it cold enough to resist melting as you work, yet soft enough to blend with flour. The visible chunks of butter in your dough should remain intact — they’ll turn into golden flakes later.
Try this simple checklist for buttery perfection:
- Use European-style butter with a higher fat content (82–84%).
- Mix minimally. When you can still see little streaks of butter, stop mixing.
- Add a pinch of salt to bring out the butter’s natural sweetness.
- Chill the dough between every major step.
When you pull a buttery crust from the oven, it should smell nutty, look golden brown, and flake like paper when sliced. That’s when you know you’ve done it right.
Pastry Crust
A great pastry crust is the backbone of every pie. It’s what gives your dessert structure and character.
Over the years, I’ve learned a few professional secrets for a tender, balanced pastry crust. The first is using a combination of flours — I like to mix all-purpose flour for strength and pastry flour for tenderness. This hybrid gives a sturdy yet delicate crumb.
Another trick: add a teaspoon of vinegar or lemon juice to your ice water before mixing it into the dough. The acid helps relax gluten formation, keeping your crust from turning tough.
Finally, I swear by rolling the dough between two sheets of parchment paper. It prevents sticking and helps you maintain an even thickness, which means it bakes uniformly. Once the crust is shaped, I chill it one last time before baking. That rest allows the butter to firm up again — one last safeguard against shrinking.
Blind Baking Pie Crust
When you blind bake pie crust, think of it as baking in stages — like building a foundation. The first bake is for structure; the second, for flavor and texture.
For me, the magic happens when you treat your crust like the star, not an afterthought. Start low, then go high. I bake at 350°F (175°C) to set the edges and establish form, then remove the weights and parchment before raising the heat to 400°F (200°C). That higher temperature crisps the bottom and deepens the color.
If you ever worry about the bottom browning unevenly, try baking your crust on a preheated baking steel or pizza stone. The direct heat contact gives your pie base that signature crisp snap, even under rich fillings like lemon curd or chocolate ganache.
How to Make Flaky Pie Crust
People often ask me how to make flaky pie crust that looks like it came from a French patisserie. My answer is simple: lamination light. You don’t need to fold the dough 20 times like croissants — just enough to align the butter layers.
Once your dough comes together, use a technique called fraisage. Press the dough with the heel of your hand, smearing it across your surface in short strokes. You’re creating thin layers of butter encased in flour. Then fold the dough in half, chill, and roll again.
That’s it. You’ve just created natural lamination — subtle layers that puff and separate in the oven. When baked, your pie crust will have visible flakes, almost like puff pastry but more tender.
Pro tip: for even more flake, rest your dough overnight. The slow hydration gives you unmatched texture.
Pie Crust Baking Temperature
When it comes to pie crust, your pie crust baking temperature controls everything from structure to flavor. I learned this the hard way after burning edges and underbaking bottoms more times than I can count.
Here’s the guide I now swear by:
- 350°F (175°C): For blind baking and delicate custard pies.
- 400°F (200°C): The sweet spot for most pre-baked shells — even color and crisp texture.
- 425°F (220°C): For pies with cold fillings or quick-bake pastry shells.
If your oven runs hot or uneven, I recommend using an oven thermometer — many home ovens are off by 10–20 degrees. And if you really want pro-level crust, bake directly on a hot steel or stone to ensure the bottom browns as beautifully as the edges.
Temperature discipline is one of those small habits that instantly levels up your baking.
Egg Wash for Pie Crust
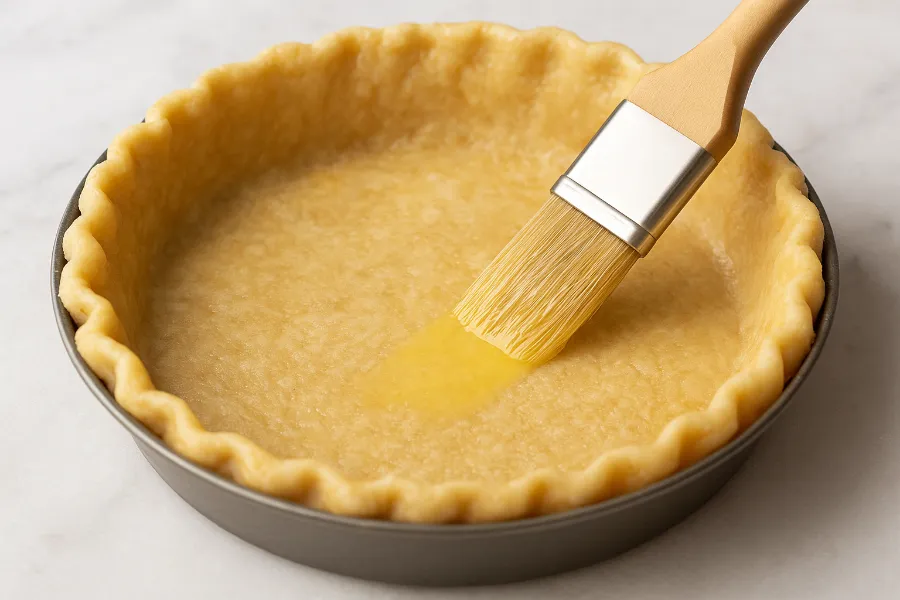
An egg wash for pie crust is the final touch that seals and perfects your work. It adds shine, color, and — in the case of blind-baked crusts — a protective layer against moisture.
There’s an art to choosing the right wash:
- Whole egg + water: Subtle gloss and pale color.
- Egg yolk + cream: Deep, glossy finish perfect for dessert pies.
- Egg white only: Transparent and crisp, ideal for sealing blind-baked crusts before filling.
Once your crust is nearly done, brush on your wash and return it to the oven for a few minutes. The result? A polished, bakery-quality shell that’s not just pretty but also practical.
Some pastry chefs even use melted cocoa butter or white chocolate on cooled crusts before adding fillings. It’s an elegant trick that keeps your pie crisp and adds a whisper of flavor.
Modern Freezing Technique
If you’ve ever battled crust shrinkage or uneven edges, freezing your crust before baking will change your life. Instead of chilling the dough in the fridge, slide it straight into the freezer for about 20 minutes.
The reason this works is simple science: when butter is frozen solid, it melts slowly in the oven. This gives the crust time to firm up and hold its shape. It also helps develop better flake.
You can go from freezer to oven without thawing — no problem. The shock of heat creates those signature, shattery layers. It’s a modern upgrade that many professional pastry chefs use for consistency and precision.
Michelin-Star Technique: Airflow and Steam
Watching a Michelin pastry chef blind bake a crust feels like watching ballet — every move is deliberate. In these kitchens, crusts are baked in perforated tart rings instead of pans, sitting atop micro-mesh mats that allow air to circulate evenly.
This airflow ensures perfect coloring from top to bottom. Their method goes like this:
- Roll dough between parchment or acetate for even thickness.
- Freeze completely before baking.
- Bake with weights at 350°F (175°C) for 10–12 minutes.
- Remove weights and raise heat to 400°F (200°C) for another 10 minutes.
- Crack the oven door during the final minutes to let moisture escape.
- Brush cooled crusts with cocoa butter for a glassy, waterproof seal.
The result? A crust so thin and delicate it breaks like glass but still holds any filling you can imagine. It’s refinement in its purest form.
Bringing It All Together
Blind baking might sound technical, but it’s really just care in action. It’s that extra 20 minutes that transforms your pie from soggy to sensational. Once you get the rhythm — chill, rest, bake twice, seal — it becomes second nature.
My personal sequence never fails:
- Mix cold butter and flour.
- Add ice water slowly.
- Rest the dough for at least an hour.
- Roll and shape into the pan.
- Freeze for 20 minutes.
- Blind bake twice, first low, then high.
- Seal with egg white or cocoa butter.
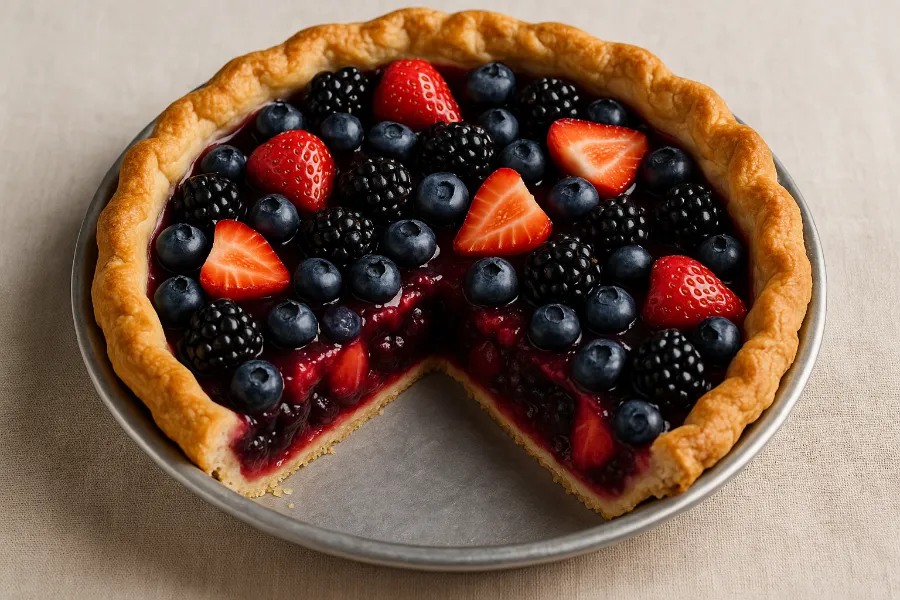
- Cool completely before filling.
Every element — temperature, timing, texture — plays a role. But when you pull that crust from the oven, perfectly golden, crisp, and fragrant, you’ll know why the process matters.
Final Thoughts
The more I bake, the more I realize that the magic of pie lies in its foundation. Filling recipes come and go, but once you’ve mastered blind baking tips for flaky pie crusts, every pie becomes extraordinary.
The golden edges, the sound of the crust cracking gently under a knife, the buttery aroma — they’re all the result of patience and precision.
So, the next time you’re tempted to skip blind baking, remember: great pies aren’t rushed. They’re built layer by layer, from cold butter and calm hands, one flake at a time.
FAQs
Blind baking means pre-baking your pie crust before adding filling. It ensures a crisp, flaky base that doesn’t become soggy from wet or custard-style fillings.
Yes, pie weights help the crust keep its shape during baking. You can use ceramic weights, dried beans, or even rice as a substitute.
Start at 350°F (175°C) to set the structure, then raise to 400°F (200°C) for color and crispness. This two-stage bake creates a strong, flaky shell.
Chill or freeze your crust before baking to firm up the fat and relax the gluten. Avoid stretching the dough when placing it in the pan.
Foil works in a pinch, but parchment paper is easier to handle and removes cleanly without tearing the crust.
Brush your crust with an egg wash—either whole egg, yolk, or white—before the final few minutes of baking. It adds shine and deep color.
Brush the baked crust with egg white, cocoa butter, or melted chocolate before adding fillings. This barrier locks out moisture and preserves flakiness.